If you’ve been following our series of design thinking articles, you’ll know that there are five key steps in this process.
So far, we’ve covered the empathize stage and the methods you can use to get to know your target audience; the define stage, looking at how to craft a meaningful problem statement; and the ideate stage, exploring various techniques for generating new ideas.
Now it’s time to explore the fourth and penultimate stage: prototyping.
Here’s why the prototyping stage is so important: Prototyping allows you to determine whether or not the design (or changes) work the way you intended them to—before they’re out in the world and in the hands of your users.
Before releasing a product to market, you want to make sure that it works as intended. Does it solve the user’s problem exactly as planned? Is it user-friendly and intuitive? Ideally, you’ll find these things out before you spend time and money developing the final product.
In this guide, we’ll cover everything you need to know about prototyping, starting with a quick recap of the design thinking process. Here’s an overview of what we’ll cover:
- What is design thinking? A brief recap
- What is a prototype?
- Why create prototypes?
- Different kinds of prototype
- Prototyping best practices
- What next?
Ready? Let’s jump in.
1. What is design thinking? A brief recap

Design thinking is both an ideology and a process used to solve complex problems in a user-centric way. Just like user experience (UX) design, it places the user front and center, focusing heavily on empathy.
What’s special about design thinking is that it advocates a solution-based approach to problem-solving. Rather than fixating on obstacles and limitations, it encourages you to experiment, iterate, and think outside the box.
As you may already know, the design thinking process can be divided into five phases: empathize, define, ideate, prototype, and test. While you might look at these steps and see a very logical sequence, it’s important to bear in mind that the design thinking process is not linear. Each step brings new discoveries to light, so don’t be surprised if you need to loop back to a previous step and redefine what you’ve done in order to move forward.
Prototyping is the fourth stage in the design thinking process. Your prototypes will be based on everything you’ve done so far: interviewing your users, defining your problem statement, and coming up with potential solutions. But what is a prototype? We’re glad you asked…
2. What is a prototype?
*Put simply, a prototype is a scaled-down version of your product; a simulation or sample version which enables you to test your ideas and designs *before investing time and money into actually developing the product. **
So, if you’re designing an app, you might create a digital prototype and test it on real users before handing it off to the developers.
Prototypes come in all different shapes and sizes, ranging from simple paper models to fully functional, interactive digital prototypes. We’ll look at some of the different types of prototype in section four. First, though, it’s important to understand the value of prototyping—which brings us to section three.
3. Why use prototypes?
Prototyping is an extremely valuable step in the design thinking process. Putting the user at the heart of the process requires you to test your designs on real users—and prototypes make this possible without spending loads of time and money.
Prototypes can help you to:
- Gain first-hand insights into how your users will interact with, and react to, the product you’re designing. Seeing an early version of the product in action shows you if, and how, it’ll work in the real world.
- Identify any usability issues or design flaws before it’s too late. If an idea or design is destined for failure, you’d rather find out in the early stages. Prototypes enable you to fail early and cheaply; they’ll expose a weak or unsuitable approach before you’ve invested too much time or money.
- Make informed design decisions. Can’t decide where a certain button should go on your app home screen? Torn between two different layouts for your website? Test a few versions in the form of prototypes and see which works best.
No matter how thorough your UX research is, many people find it difficult to truly conceptualize a product until they have it in front of them. Prototypes allow you to iterate, refine, rework, and make improvements until you have a market-ready product.
4. Different kinds of prototypes
Now let’s take a look at some of the different kinds of prototypes you might use. Prototypes can vary in terms of their form, fidelity, interactivity, and lifecycle:
- Form: Is it a hand-drawn prototype, or a digital one? Is it for mobile or desktop?
- Fidelity: How detailed and polished is the prototype? You’ll often hear the terms high-fidelity and low-fidelity in relation to prototypes.
- Interactivity: How functional is the prototype? Can the user click on it or interact with it, or is it view-only?
- Lifecycle: Is the prototype a quick, disposable version that will be replaced with a new and improved version? Or is it a more enduring creation that can be built and improved upon, potentially ending up as the final product?
Generally, prototypes can be divided into low-fidelity and high-fidelity. Fidelity simply describes how similar to the final product the prototype is; whether it’s an accurate representation of the final product, or more of a basic, early-stage model. Here’s an example of how a prototype for one screen would look from low to high fideltity:

Image credit: Anami Chan
So how do you know whether to use a low, mid, or high-fidelity prototype? It all depends on what you want to achieve with your prototype, as well as how complete your design is.
Low- to mid-fidelity prototypes
Low-fidelity prototypes are ideal if you want to rapidly test broad concepts. They’re quick, cheap, and highly collaborative; they don’t require advanced design skills, so different people from different teams can easily be involved.
As a rule, low-fidelity prototypes keep content and visuals to a minimum, presenting only the key elements as basic shapes in order to convey visual hierarchy. Their simplicity can lead to uncertainty during testing; it’s not always easy for users to identify what and how the prototype is supposed to work.
Low-fi prototypes are also limited in terms of interactivity, so it’s not possible to convey animations or transitions.
Mid-fidelity prototypes can also be inexpensive to create (depending on the tools you choose), and don’t require much design knowledge or experience. These are great if you want to test broad functional features, such as the user flow for one particular use case (i.e., the user taps this button, which leads them here, then here then here). This is a great approach to take if you’re short on time and/or just need to get an overview across screens to be sure that the solutions youve designed actually work and don’t overlook any key considerations.
Some of the most common low- and mid-fidelity prototyping techniques include paper prototyping and clickable wireframes. These methods are particularly useful for iterating on initial design ideas, and getting the designers and stakeholders aligned on basic design elements. Let’s explore each of these techniques in more detail.
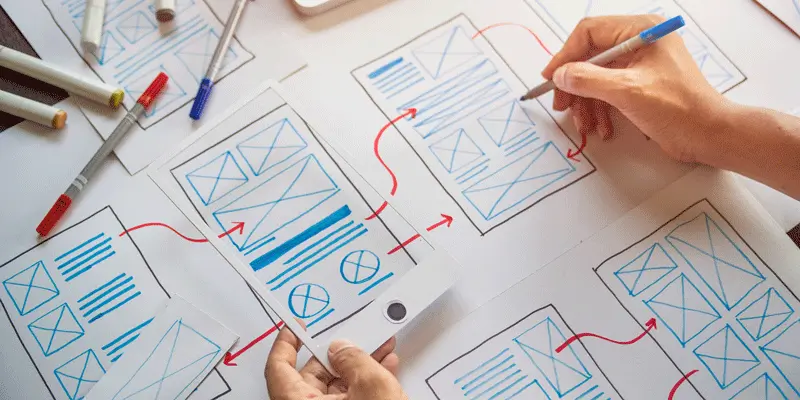
Paper prototyping
Believe it or not, you can create prototypes using nothing more than pen and paper. Paper prototypes are usually low-fidelity. You simply draw different screens of a digital product interface onto sheets of paper—no fancy software needed. You can even simulate interactivity during testing by moving the screens (or sheets of paper) around based on how the user navigates the paper prototype. Check out how Google does paper prototyping.

Photo by Amélie Mourichon on Unsplash
Paper prototyping does have its advantages—it’s quick and affordable, and can be used to document the evolution of your design, giving you tangible artefacts to refer back to. However, paper prototypes can be limited; you won’t be able to convey visually complex interfaces, nor high levels of interactivity. They are best kept to the very early stages of the design process when you need to quickly explore a variety of broader ideas or concepts.
Clickable wireframes
Clickable wireframes can also be used as low-fidelity prototypes. A clickable wireframe not only represents the visual layout of a digital interface, but also offers a certain degree of interactivity. You can simulate the journey a user might go through by including hyperlinked buttons which lead to another wireframe.
Clickable wireframes are still very much a bare-bones representation of the finished product, including things like image and text placeholders together with buttons and navigational elements. They can be created using special wireframing software, or even with a presentation tool like PowerPoint or Keynote.
The great thing about clickable wireframes is that they can be quickly and easily modified. Unlike a paper prototype where you’ll need to redraw the entire screen if you want to make changes, you can make minor edits without starting from scratch. Still, low-fidelity wireframes are best suited for prototyping in the early stages of the project.
High-fidelity prototypes
Then there are high-fidelity prototypes: the more detailed, realistic prototypes that look and operate much like the final product. You’ll move onto hi-fi prototypes once you have a good idea of what you’re going to build. They’ll help you to fine-tune the design and get it ready for market.
Here’s a comparison of a mid- and high-fidelity prototype from Jamal Nichols:

High-fidelity prototypes tend to include all the visual components, interactive elements, and content that will be featured on the final product. In fact, they look just like a real app or website—which is hugely beneficial when it comes to user testing. The user feels like they’re interacting with a live product, so you can expect them to behave naturally and provide meaningful feedback.
Of course, high-fidelity prototypes are more expensive and time-consuming to produce than their low-fidelity equivalents. However, they are the most useful option when it comes to testing your designs. With a high-fidelity prototype, you can test pretty much every single element of your product before sending it off for development. Not only that: hi-fi prototypes enable you to show your colleagues and stakeholders from other departments exactly how the final product should look.
When it comes to high-fidelity prototypes, you’ll most likely create digital prototypes using specialist software. Some of the most popular prototyping tools on the market include Sketch, InVision, and Flinto. You can find a comprehensive list of prototyping tools here.
5. How to create a prototype: Tips and best practices
Now we know exactly what prototyping is, why it’s so valuable, and what kinds of prototypes we might use throughout the design process. There’s only one thing left to do: create your own!
Here are some pointers that will help you along the way:
Choose the right kind of prototype
Before you create a prototype, consider what stage you’re at in the design process, as well as the time and resources available. Low-fidelity prototypes make sense in the early stages, but you’ll want to move on to hi-fi prototypes as you get closer to shipping your product.
Set concrete goals
Have a clear idea of what you want your prototype to achieve. In other words, what do you want to find out when you test your prototype? Remember to focus on user needs, keeping your problem statement in mind at all times!
Use the right tools
If you’re new to digital prototyping, spend some time playing around with a few of the most popular industry tools. Find the tool that meets your needs in terms of features and functionality, and familiarize yourself with the interface before you start prototyping. When the time comes, this will make the prototyping process much easier!
Take action!
Design Thinking is all about generating ideas and testing them, so prototype as and when you need to. Remember, the Design Thinking process isn’t strictly linear, so you can whip up a prototype at any time.
6. What next?
Prototyping and testing go hand in hand, so once you’ve created a prototype, you’ll need to put it in front of real users. You’ll observe how they interact with the product in its current state, and ask for feedback on how the experience feels. You can learn more about how to test your prototypes in this guide. Through continuous prototyping, you’ll make informed design decisions—iterating your way to an intuitive, user-friendly product that your users will love.
If you’d like to learn more about prototyping in UX design, check out these articles: