Introduction
Welcome back to your UI design short course! We're now on day four, and today, we'll be delving into the world of typography. If you thought that choosing fonts was a one-step process, you're in for a treat. Typography is so much more than choosing a nice font to go with snappy text; it's the art of using typefaces to ensure your interface is readable, accessible, and unique.
So far, our Ethical Eater app screen is coming along nicely. We’ve wireframed our design, translated it onto our Figma design file, and created an awesome logo using basic shapes. Today, we’ll be injecting some personality into the screen with our own original text.
Let's look at what we'll be learning today:
- Introduction to typography
- Introduction to typesetting
- How to choose the right font for your app
- Putting text into your app screen
Beautiful typography, here we come!
1. Introduction to typography
Typography is so much more than words and fonts; it's a complex art form and a vital component of UI design. When you see text on a website or app, what you don’t see is that a UI designer has worked hard behind the scenes to balance the style, arrangement, and aesthetic of the letters to elicit emotions and convey specific messages to the user. It's typography that guides users around the interface—and without proper typography, the user experience will take a hit.
Good typography will establish a strong visual hierarchy, build trust with your users, and help to solidify your branding. It's the reason we instantly associate iconic fonts like Myriad Bold with LinkedIn, or Didot with Vogue. Having good, strong fonts that visually stimulate and reflect your brand's personality could be the difference between someone staying on your website for two minutes or two hours.
Let's look at some of the key elements of typography:
Fonts and Typefaces
The terms 'font' and 'typeface' are often used interchangeably, but they actually refer to different things. A typeface is a family of related fonts, while fonts refer to the weights, widths, and styles that constitute a typeface. For example, Arial is a typeface, and Arial Bold is a font.
Hierarchy
Typographical hierarchy is the process of using sizing, color, contrast, and alignment to guide users on which text should be noticed and read first. A typical example of typographical hierarchy is size: headings should always be larger than subheadings and standard text.
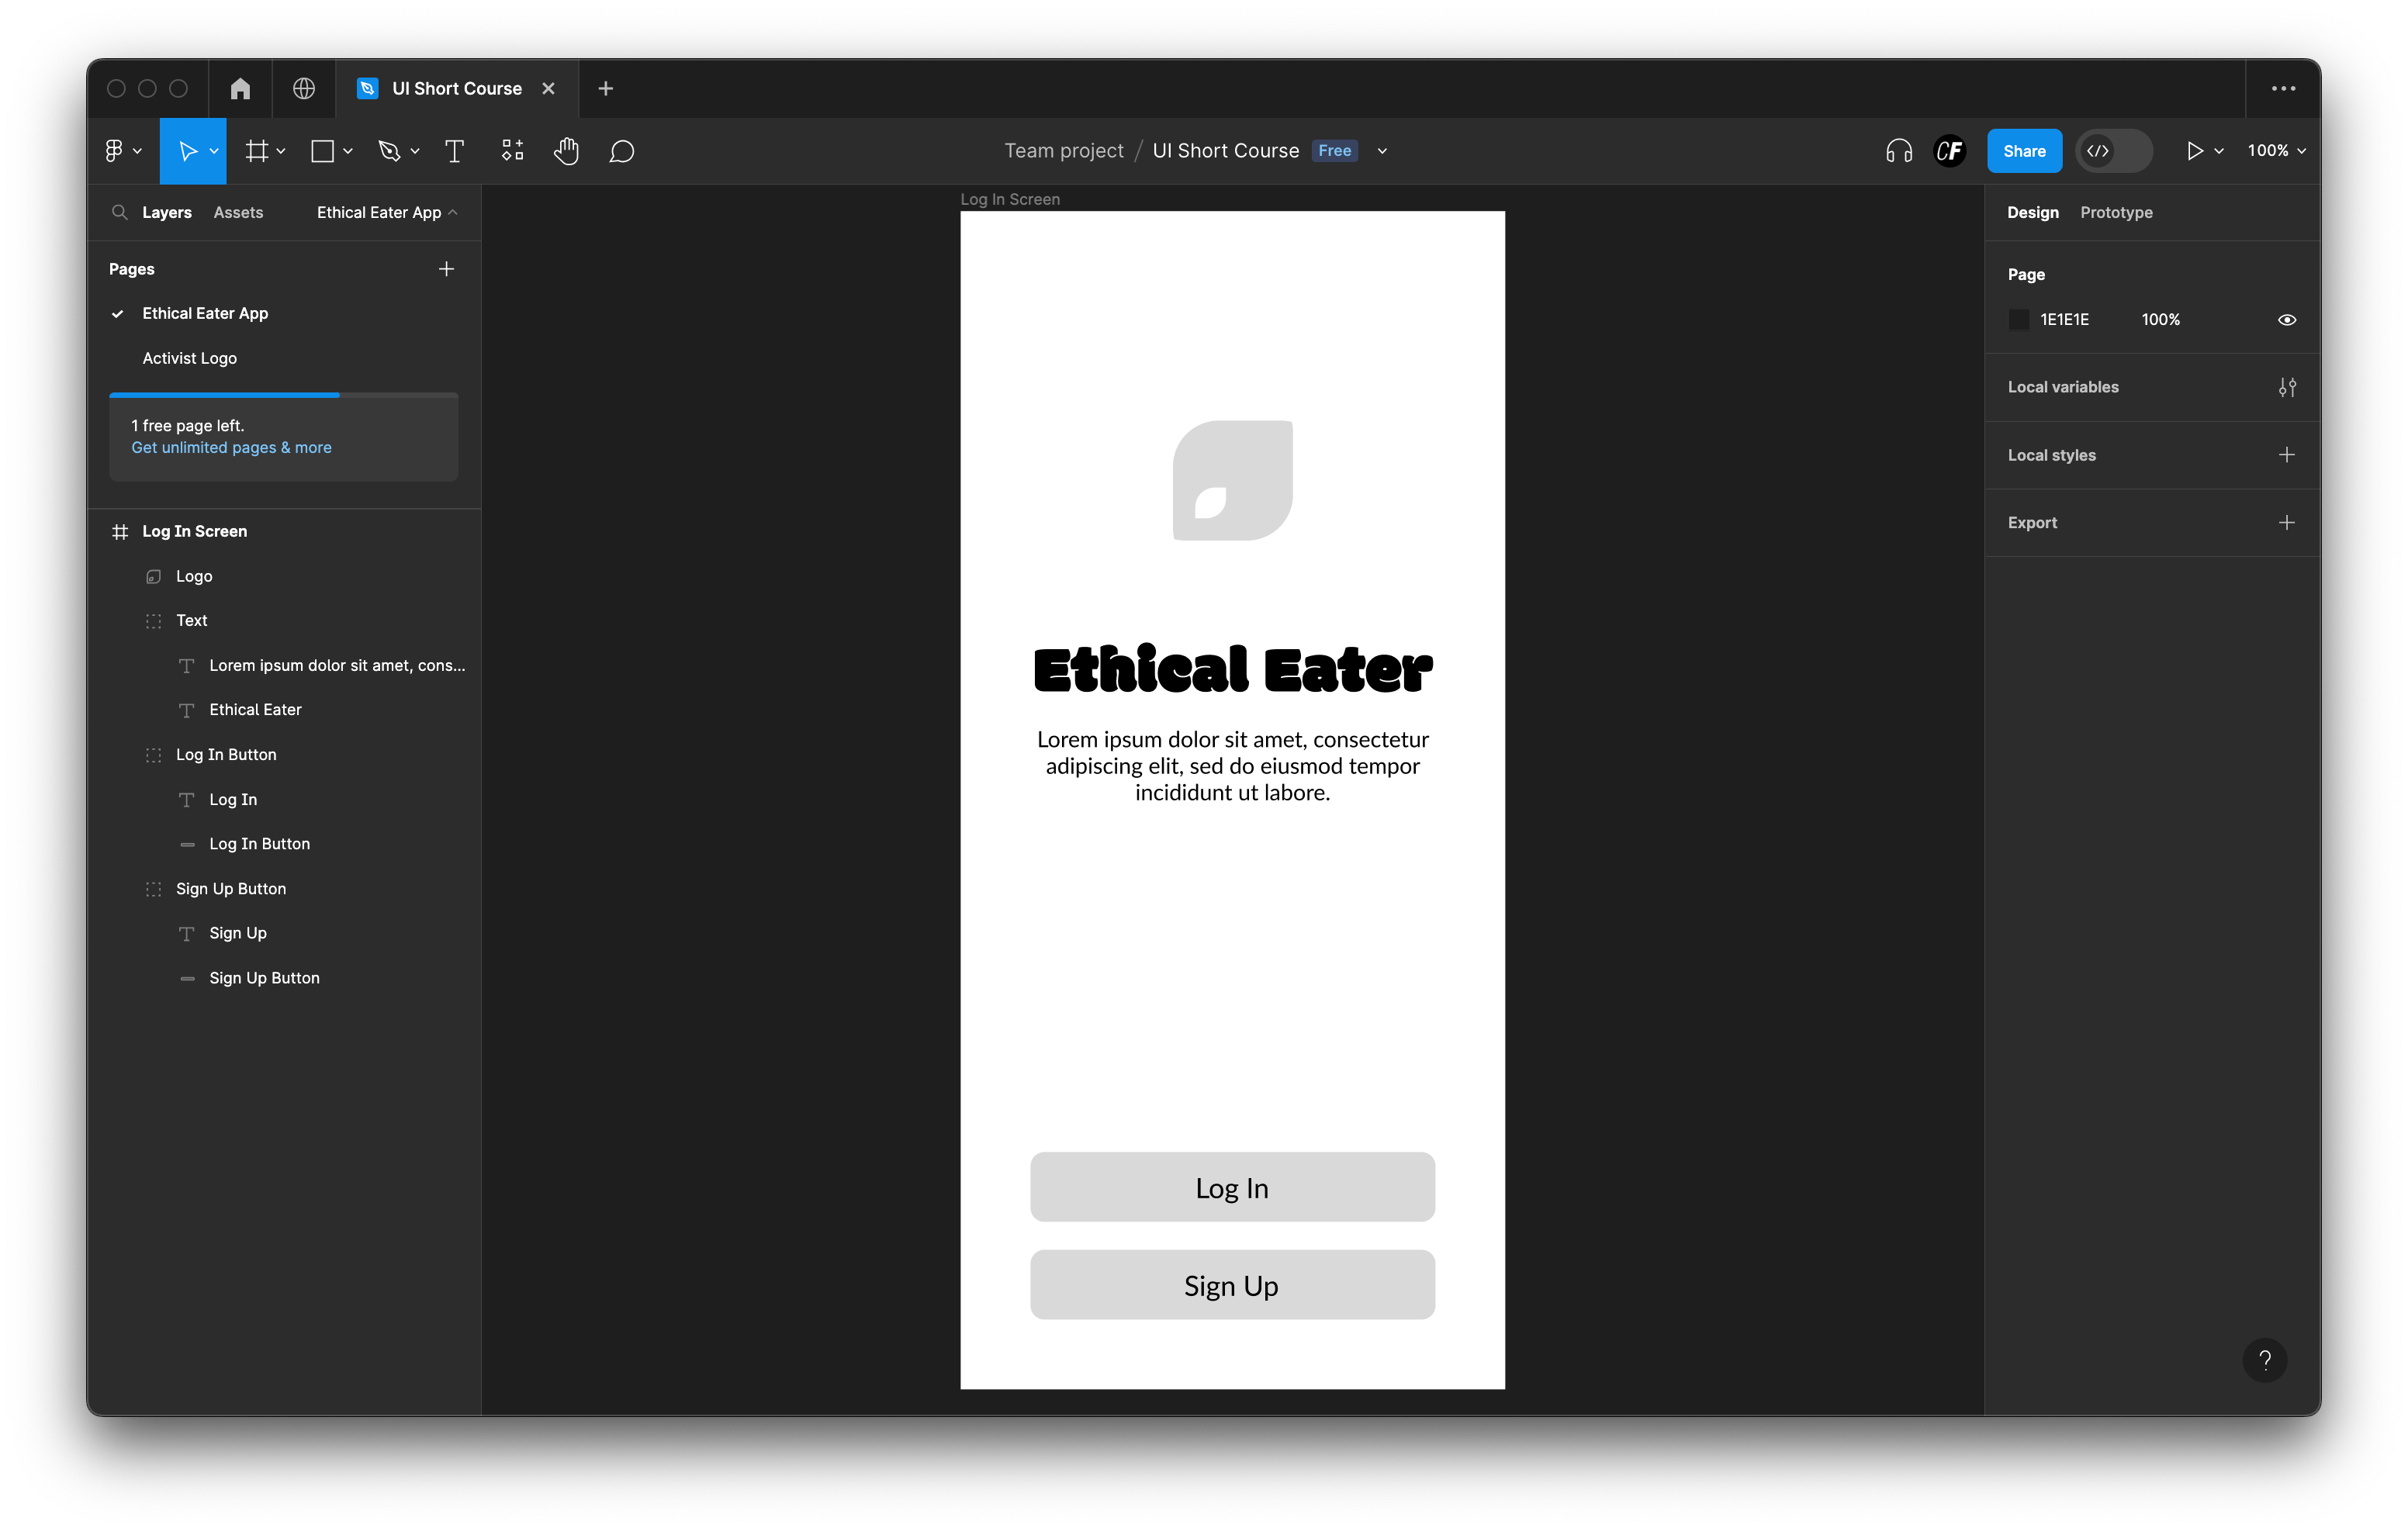
See how the heading is considerably larger than the body text in our Ethical Eater app?

Contrast
Like hierarchy, contrast helps to convey which ideas or messages you want to emphasize to your readers. You can create contrast by playing with varying typefaces, colors, styles, and sizes to create visual impact and break up the page's text.
Consistency
Though it might seem like a contradiction to the above points, consistency is key if you want to avoid a confusing and messy interface. It's good practice to establish a consistent hierarchy of typefaces (one consistent font for headers, another for subheadings) and stick to it.
White space
Also known as 'negative space,' white space is the blank area around text or graphics. It mostly goes unnoticed by the user, but white space is vital for establishing hierarchy and keeping the interface uncluttered.
Alignment
Alignment is the process of unifying and composing text, graphics, and images to ensure equal space, size, and distance between each element. For example, aligning your text to the right will seem counterintuitive for readers who read left to right.
2. Introduction to typesetting
When it's time to put text into an interface, UI designers take a lot of time to carefully compose the text, adjusting space between lines and letters. This art of arranging text is called typesetting. Once the text is in the interface, UI designers use typesetting techniques to improve the legibility and readability of the text, all the while making sure it looks balanced and high-quality.
For this exercise, we’ll focus on three fundamental techniques you'll need to typeset your text: kerning, tracking, and leading. These 3 processes concern themselves with the spacing between individual characters, words, or lines of text.
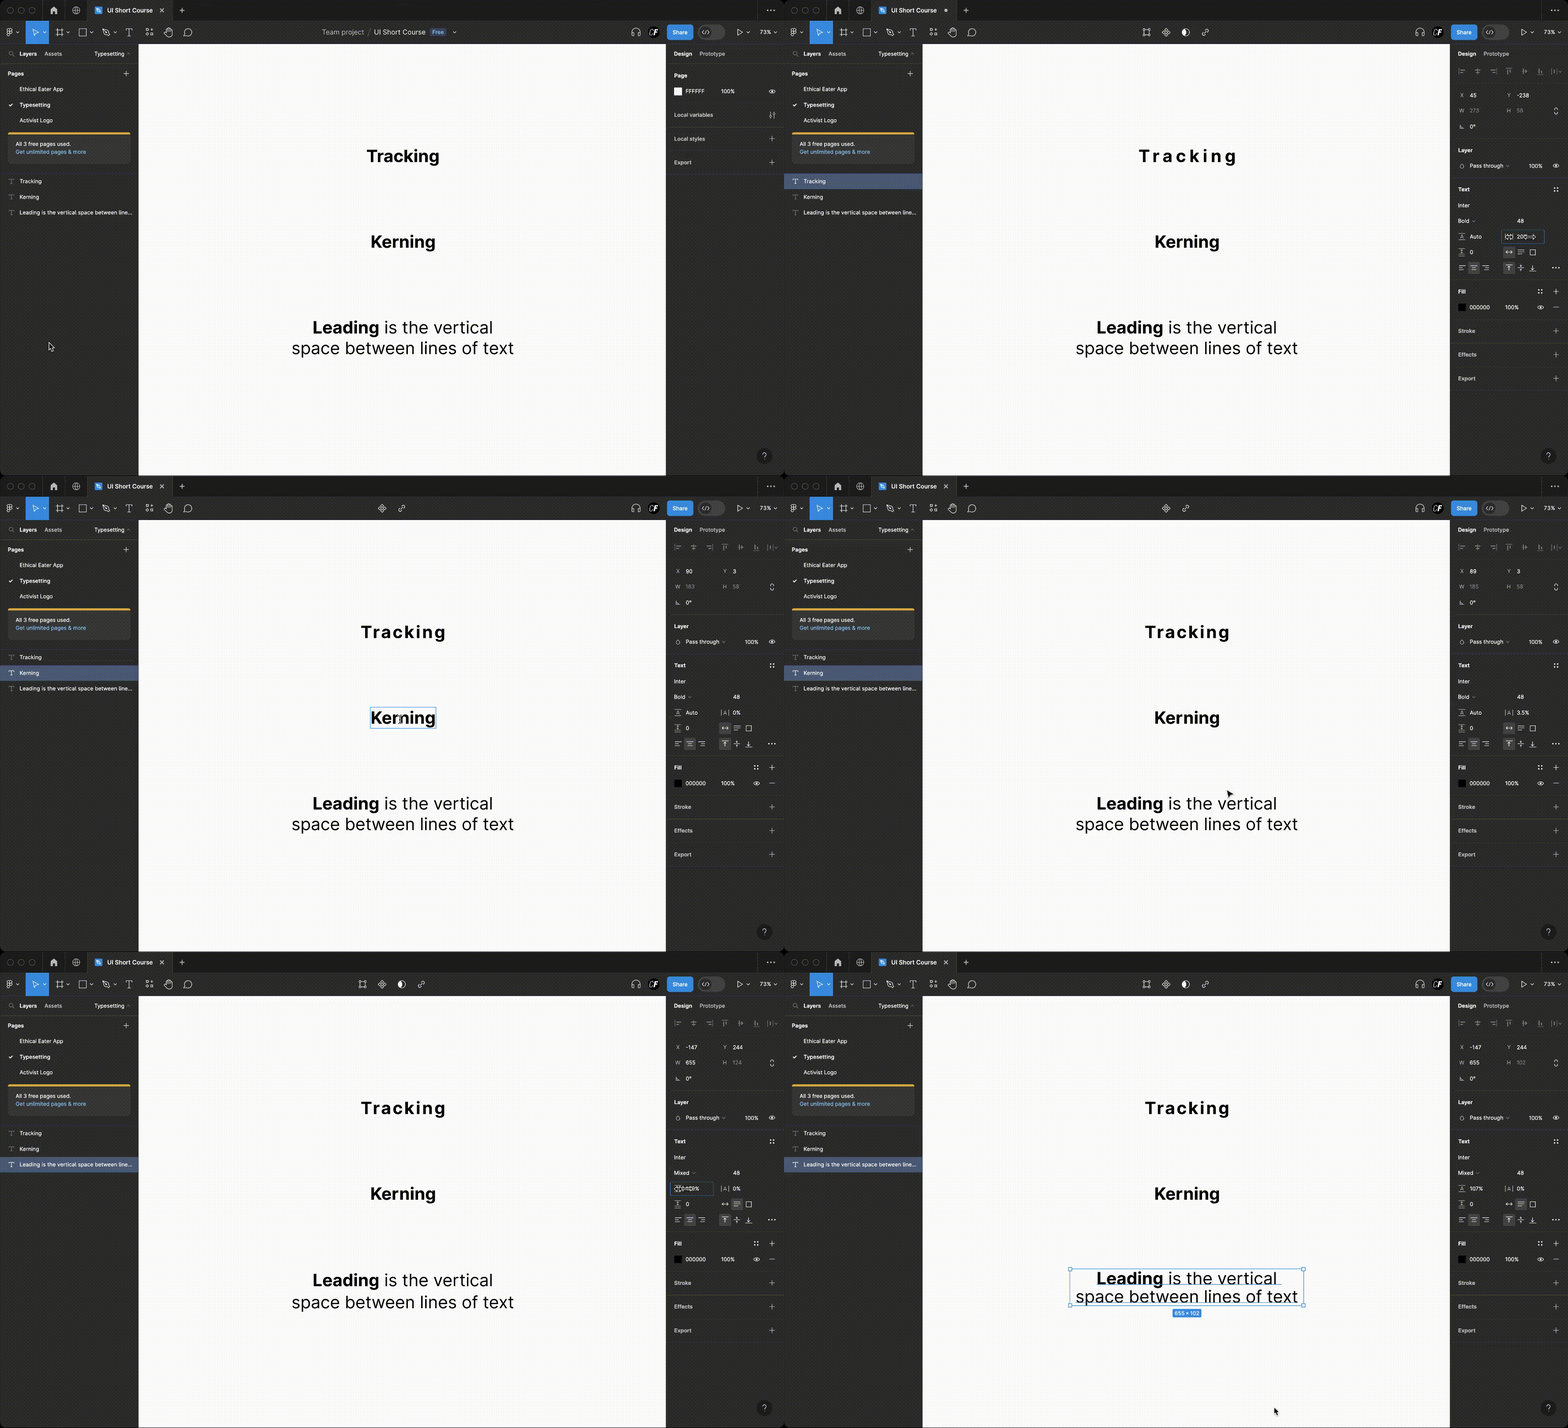
- Tracking is concerned with the spacing between all the letters in a word to ensure they're evenly distributed.
- Kerning is the practice of adjusting the space between just two individual characters (letters or glyphs).
- Leading is the practice of adjusting the space between lines of text.
Here's a recording we made in Figma to show the difference between the three techniques:
When it comes to adding your text for the Ethical Eater screen, you’ll want to take some time to play around with these techniques until you’re happy with how the text looks.
But why does it matter? Let’s keep going to find out why it’s important for your brand or app that you choose an appropriate font.
3. How to choose the right font for your app
Now that we've familiarized ourselves with the different typography elements, let's talk about choosing fonts for your app screen. With what feels like an infinite selection of fonts to choose from, it's easy to feel overwhelmed. Here are a few key considerations:
Reflect on personality and tone
Think about your chosen app and intended audience. Depending on which of the two climate change apps you’ve gone for, how do you want your users to feel when they first download it? Do you want the app to feel friendly, welcoming, playful, or serious? Are you going for a bold or subtle tone? Once you've answered these questions and narrowed down some typefaces, it will be much easier to see which fonts work best.
Don't use too many
Using multiple typefaces on one screen can result in a cluttered interface. Fonts from the same typeface are intended to work harmoniously together, so sticking to one typeface will give your app screen a more cohesive look.
Ideally, your chosen typeface should encompass enough range to enable you to pick your primary and secondary fonts from the same family. Your primary font is used for all larger texts, such as headings (and even logos). As this will tie in with your logo, you can be more daring and creative when choosing this font. Your secondary font will comprise the body of your copy, including your buttons.
If you use a second typeface, make sure the fonts you choose to use work well together. Later on in this tutorial we'll share some AI tools that can help you with font pairing.
Keep it readable
Have you ever been on a website and ended up with a headache after trying to read a super fancy font? Form over function is never a good idea in the long run. No matter how pretty a font is, no user should have to concentrate just to read a sentence. When choosing a font, especially a secondary font, readability should be the number one priority.
Some fonts have a small line or stroke attached to the end of a larger stroke; these are called serif fonts. Some of the most readable examples of serif fonts include Times New Roman and Georgia. Some fonts do not have this ornamental stroke and are more modern and simple; these are called sans serif fonts. Some examples of sans-serif fonts with good readability include Helvetica, Futura, and Arial.
You can read more about font types in this handy guide from Figma.
4. Putting text into your app screen
Now for the practical part: putting text into your app screen, and coming up with a description that you feel sums up your app perfectly. If you refer back to the original screens, you'll see that we've come up with a baseline description to serve as a guide for how long yours should be—but we encourage you to play around with your own wording and copy!
Step 1: To create a new text field in Figma, find the Text tool in the toolbar or use the keyboard shortcut, T. Then click anywhere on the canvas to start typing! Notice what changes in the right sidebar; you’ll see lots of new tools related to formatting text. Just hover over each item to see what it’s used for.
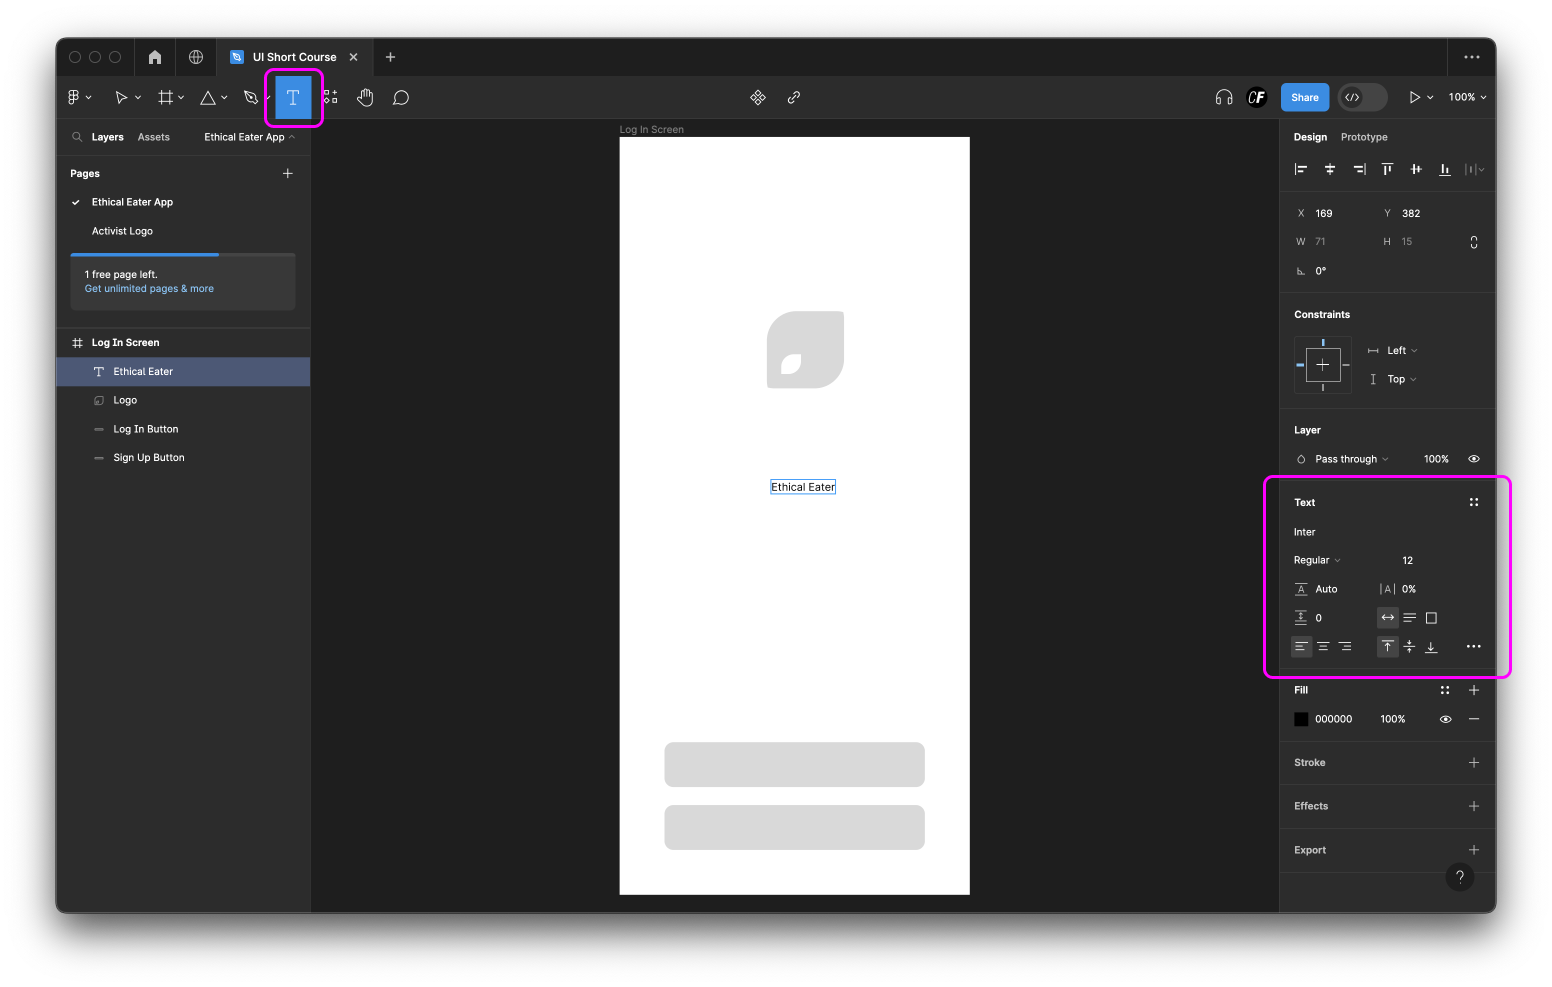
Play around with the text until you’re happy with how it looks and where it sits on the page. For example, you could increase the size of the text, change the weight to bold, and align the text to the center of the screen.
This is also a good opportunity to position your logo if you haven’t already! Remember to pay close attention to hierarchy; think about the order in which you want your users to read your text.
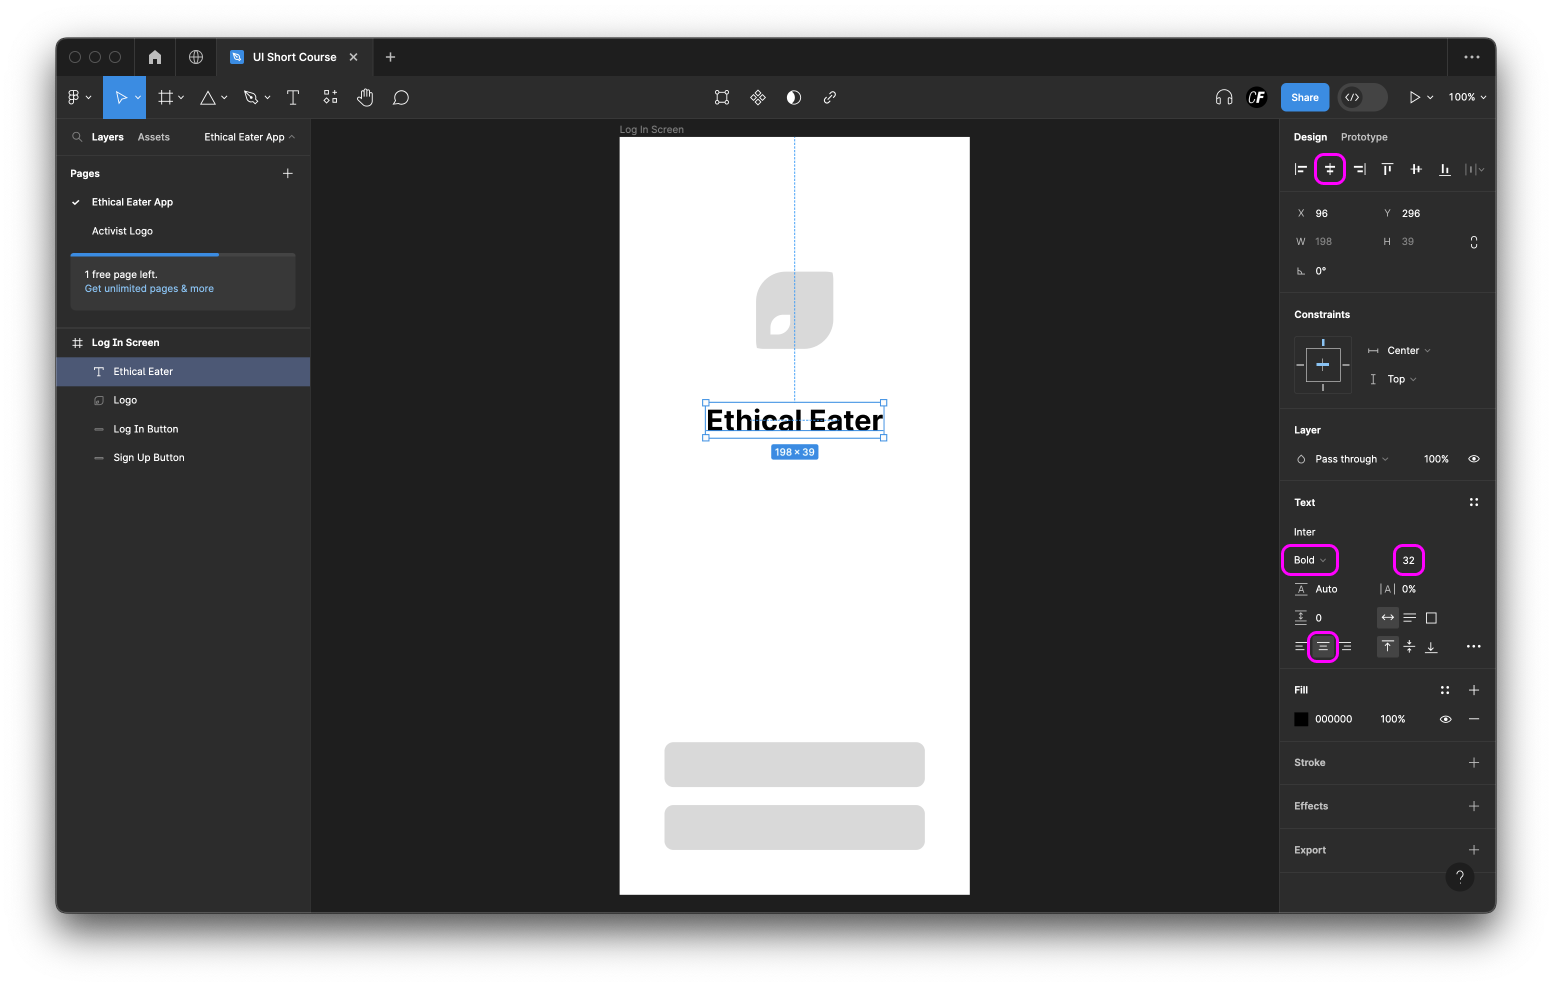
Step 2: Now it’s time to add the introductory text to the welcome screen and text to the button labels. You’ll need to add a new text layer for each individual section of text so that you can edit the styles independently. You can adjust the size of your textbox using the controls in the right sidebar or by clicking and dragging on one of the corner points, just like with a shape.
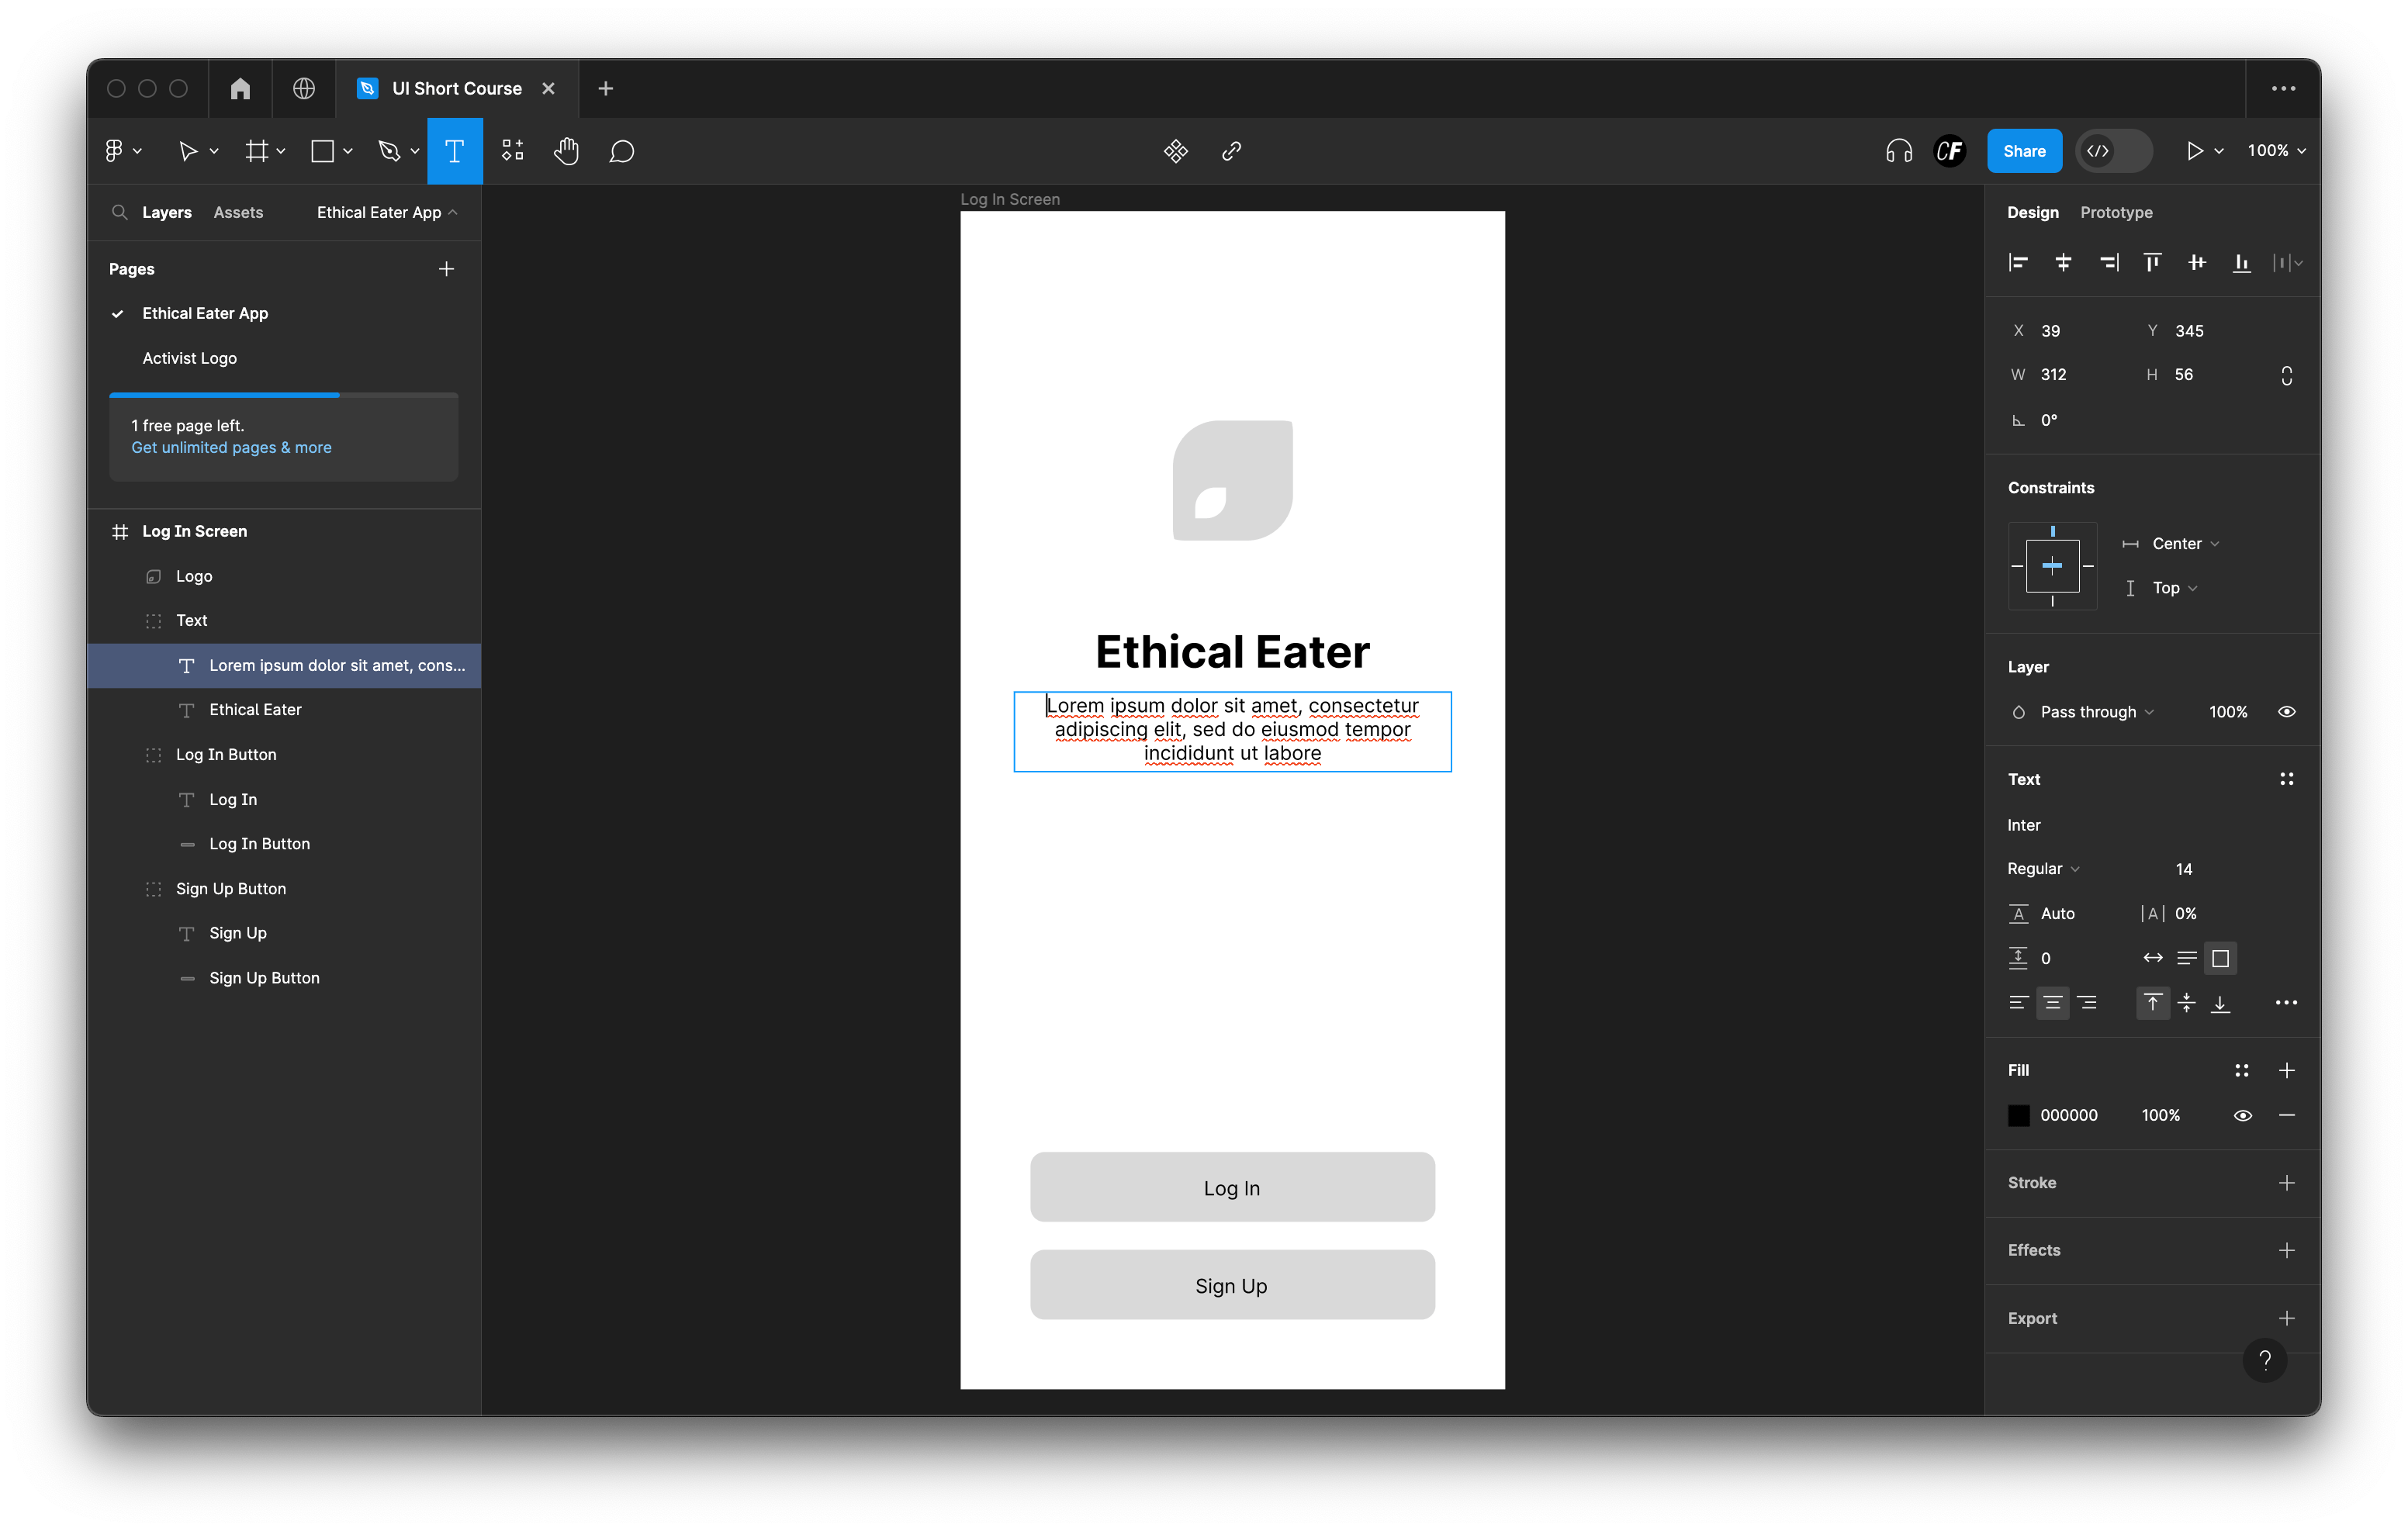
If you’re not sure what to write in the fields yet, you could use an AI tool to help generate some text.
For example, you could use ChatGPT to create the text. Here's an example of a prompt you could use: “Generate text for a welcome screen for a mobile app called Ethical Eater, a digital product that helps users reduce their meat consumption and share healthy recipes with friends. Write it in a welcoming tone and no longer than 100 characters.”
Step 3: Next up, it's time to choose your typefaces and fonts. Like we mentioned earlier, it's important you choose fonts that work harmoniously together. If you're using more than one typeface or font, pay attention to font pairing.
If you're feeling stuck, sites like Google fonts and 1001 fonts are great places to start. The internet is also abundant with font inspiration websites such as Typewolf, where you can find endless font recommendations and lists to spark your creativity. You can also check out these 8 typography trends to get inspired. Here's another area you could use an AI tool: prompting ChatGPT to suggest suitable font pairings.
Once you’ve downloaded and installed your fonts, you’ll find them in the text section in the right sidebar in Figma. If you can’t find them, try quitting and reopening Figma.
Your fonts might look or feel slightly different once you see them in Figma and on your wireframe, so after installing them and adding your text, you might want to adjust the size, style, or position of the elements on your welcome screen until it feels right.
Step 4: Now, it’s time for typesetting. Experiment with the kerning, tracking, and leading using the character spacing and line spacing options in the right sidebar—check the recording above if you need more guidance. Keep adjusting these until the words look well-balanced.
Don’t worry if it’s not immediately obvious to you, a designer’s eye becomes trained in this over time, with practice. We can recommend simple and free online game, Kern Type, to practice for yourself!
Summary
And that's all for day four—well done! By now, you should be able to see how your climate change app screen is taking shape. Tomorrow, we'll add the finishing touches to our screens with color and imagery. We're nearly there, so keep up the great work!
Typography is a crucial part of UI design, and having a handle on the basics is a fantastic start. Already, you're one step closer to becoming a pro.
See you tomorrow!
Daily task
Add text to your Ethical Eater app screen and choose fonts for the text. Don’t forget to add text to your buttons too!
If you want to experiment with some AI tools, this is a good tutorial to have a play around. ChatGPT could be used to generate text or suggest font pairings. Relume Ipsum is another tool that can generate text for you, if you’d like some help getting started! It's also a plugin for Figma so it you can use it without leaving your design file. Just make sure you proofread the suggestions and edit the results from the AI accordingly so it aligns with your vision of the Ethical Eater app!
Finally, you can test your typesetting skills in this free online game, Kern Type, and practice for yourself!
To build on your new knowledge, check out these typography guides over on the blog:
