
Welcome back! You’ve completed the first two stages of the design thinking process, and now it’s time to learn stage three: ideate.
By the end of this tutorial, you’ll:
- Be familiar with a few basic UX ideation methods
- Understand how to conduct an ideation session on your own (or adapt it for a group)
- Generate an idea in response to a HMW statement
Here’s what we’ll dive into:
- Quick review
- Ideate: An introduction to the third stage of the design thinking process
- Essential UX ideation methods
- Ideating alone vs. with a group
- Practical task: Run an ideation session
- How to know which idea(s) to keep or toss
- Summary
- What to do now
1. Quick review
Tutorial 2 gave you an overview of the first two stages of the design thinking process: empathize and define. How about a quick review to make sure you’ve got it?
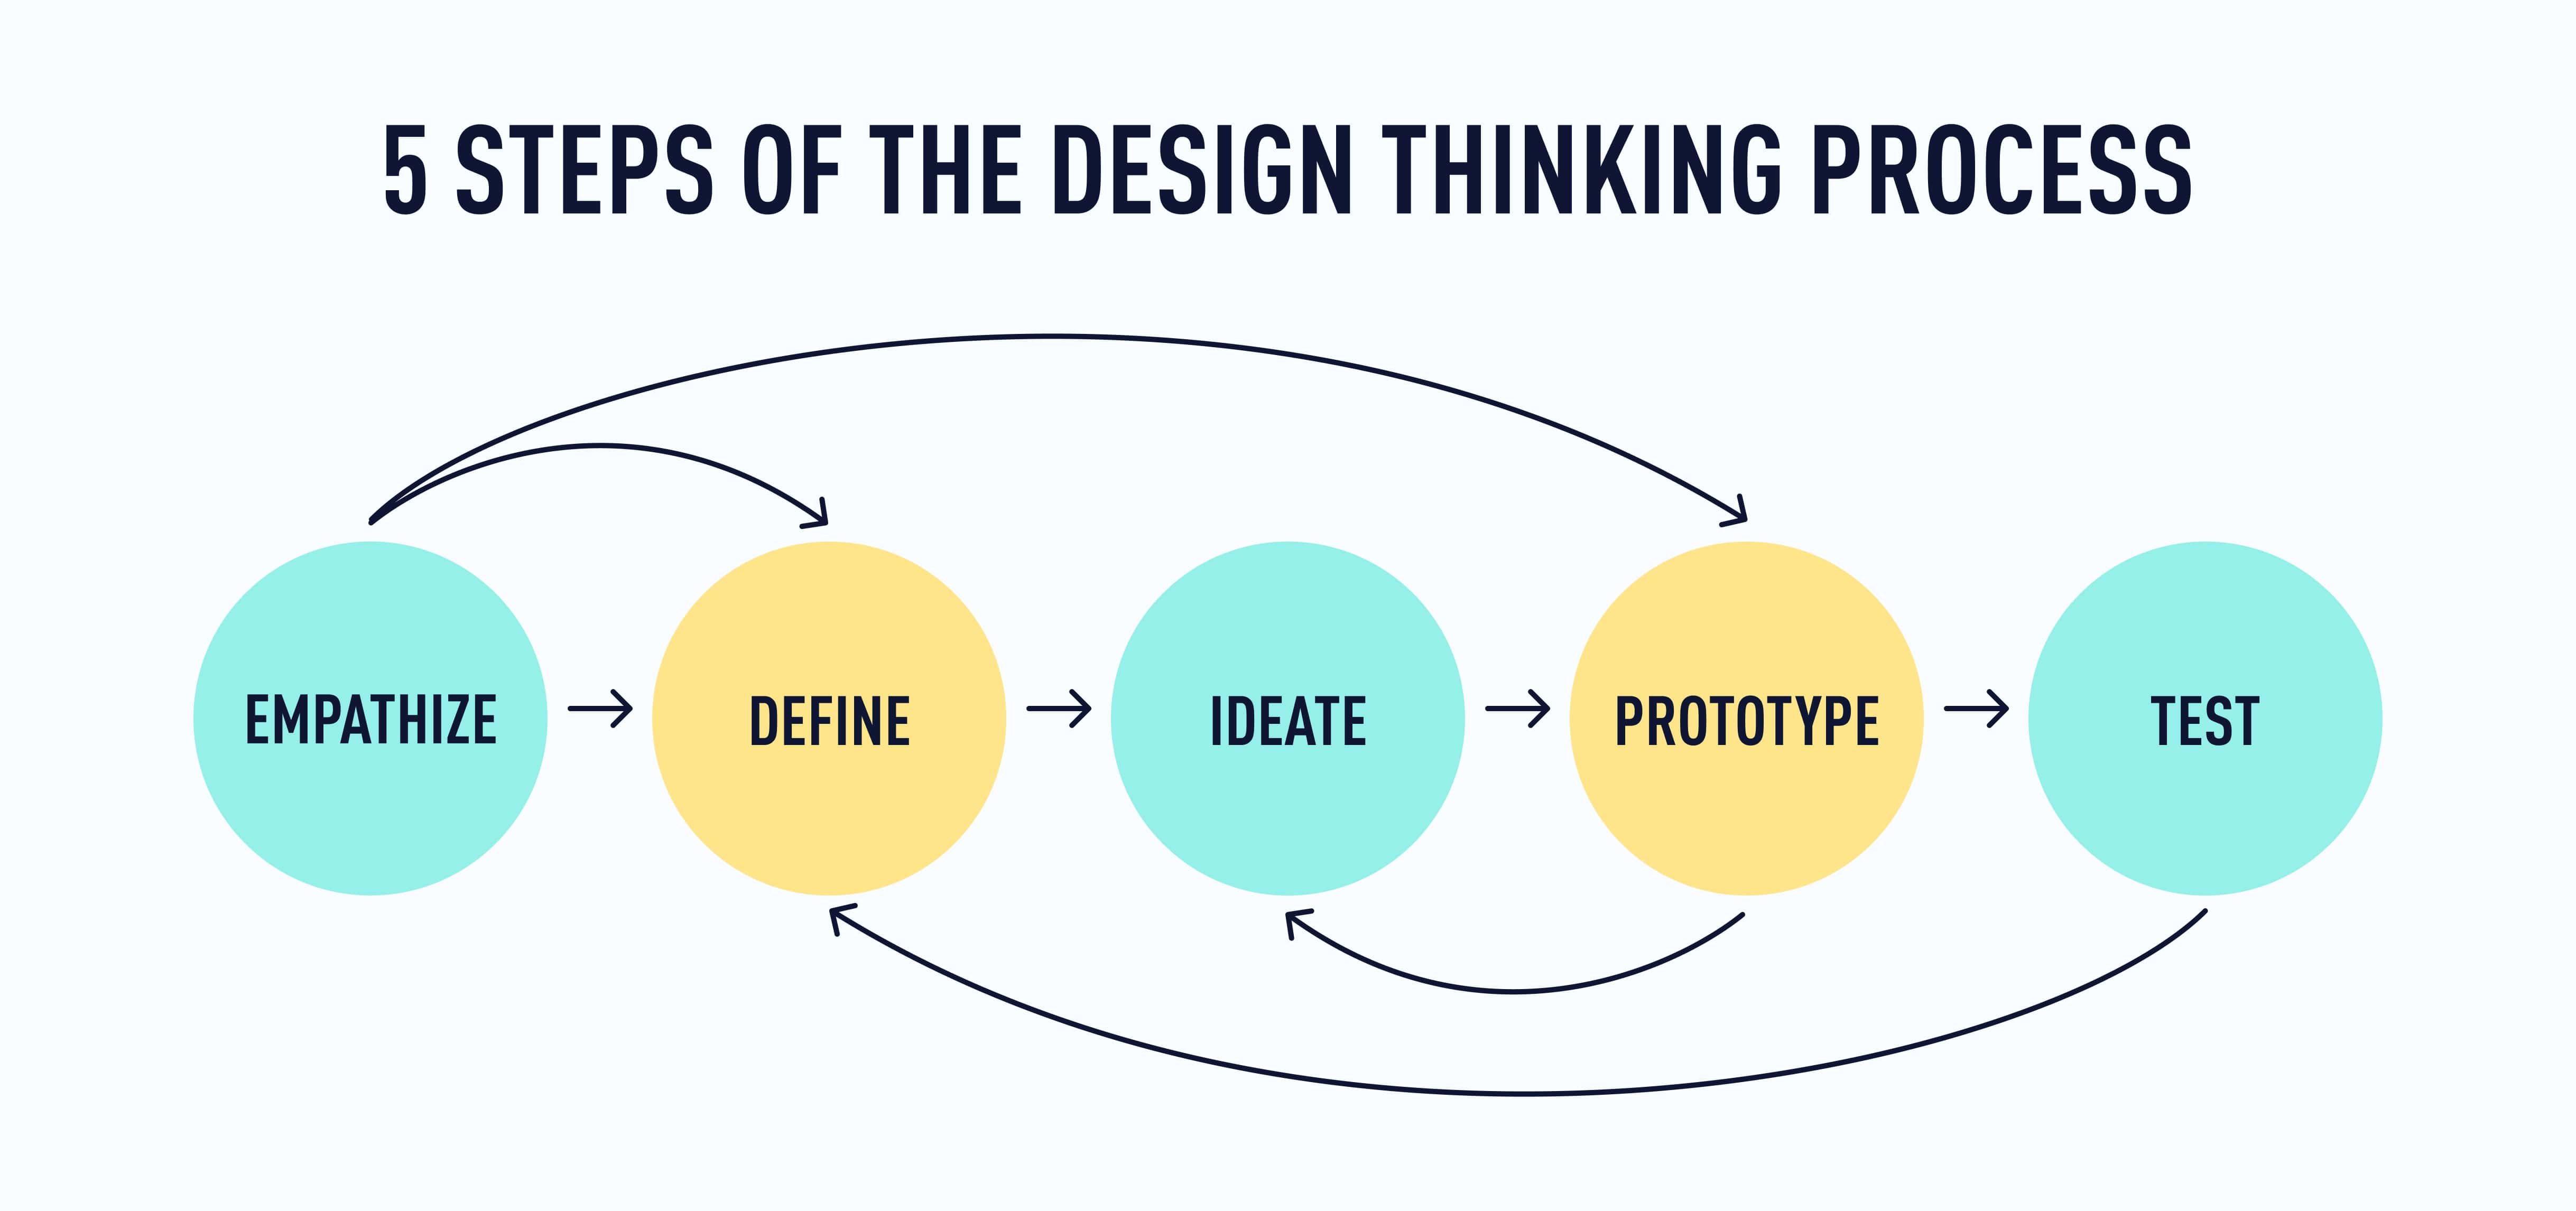
Empathy is absolutely essential to UX design, and it’s all about connecting with the needs, goals, and pain points of the people who (will) use the product you’re designing. The most important way this happens is through user research, which places you in direct contact with the people who are (or will be) directly impacted by your design work.
This first stage gives you a clearer understanding of the variety of problems and possibilities you can address moving forward—which naturally takes you into the second stage of the process, where you concisely define the problem or possibility you’ll focus on.
A common way to do this is with a how-might-we (HMW) statement, with the goal of determining the focus as specifically as possible without limiting the solutions you might come up with in the ideation stage—and if you completed Tutorial 2, you’ve got your own HMW statement crafted and ready to go!
Finally, it’s important to note that the line between these two stages can get a little fuzzy. Sometimes the problem definition will start to come into focus while you’re doing user research and noticing clear patterns; other times, you might start trying to define your focus and find that you need to go back to your research data (or do fresh research!) to see if the direction you’re heading in is really accurate to what your users need.
You might even find that the direction you define evolves later in the process, in prototyping or even in testing. But let’s not get ahead of ourselves. Let’s do some ideation and see what happens!
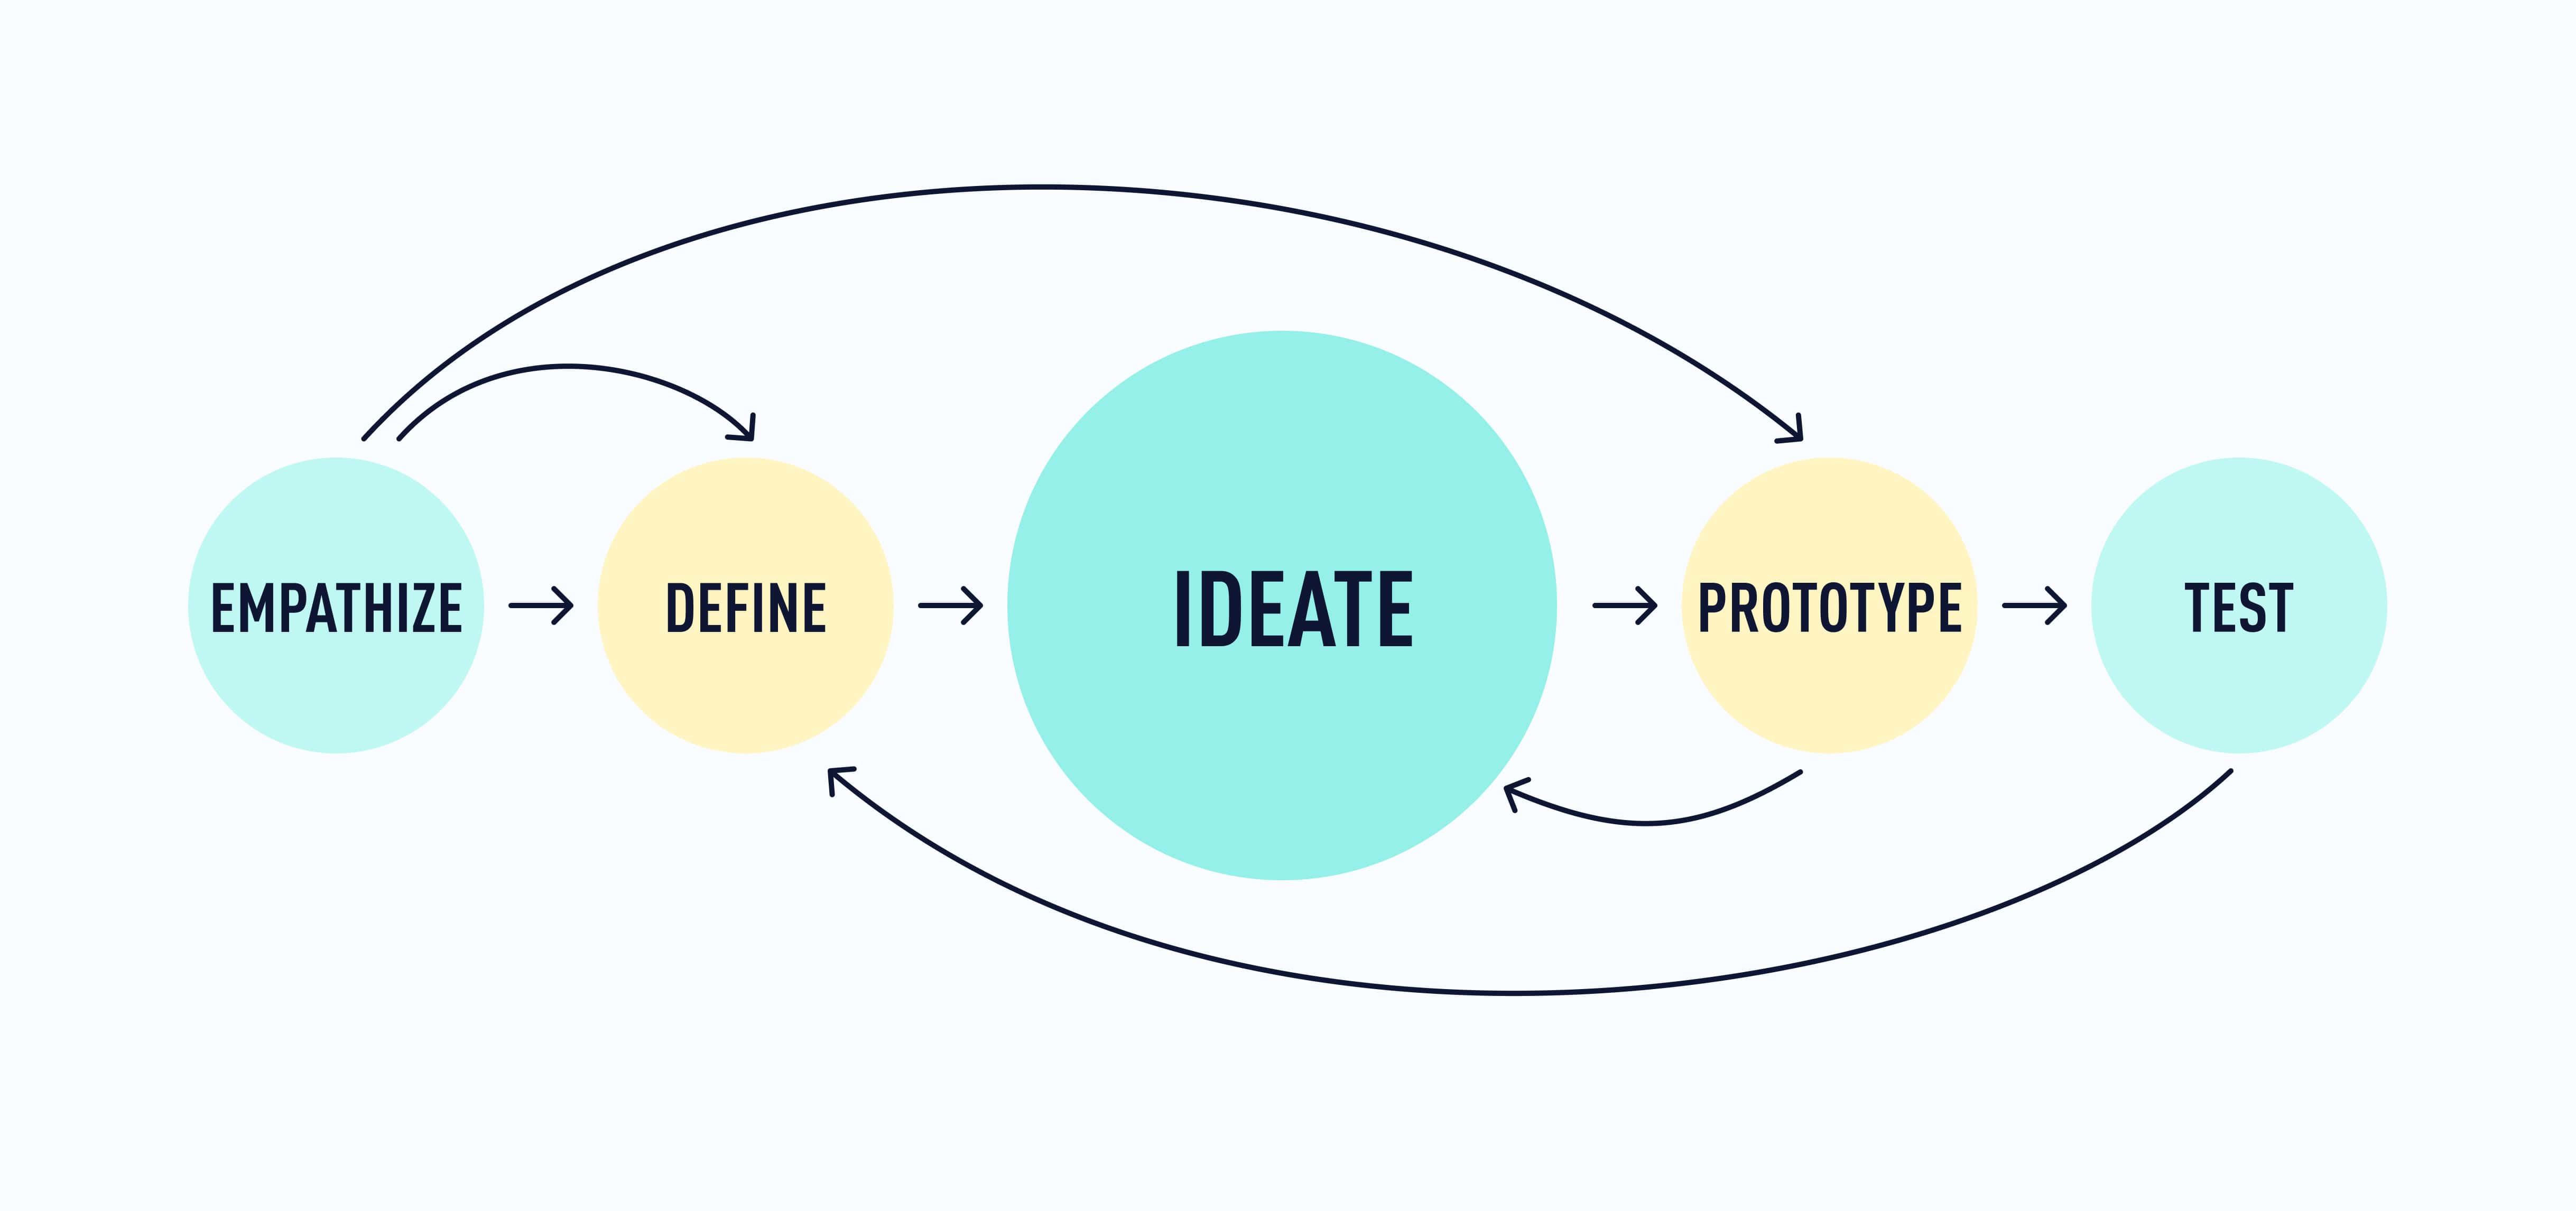
2. Ideate: An introduction to the third stage of the design thinking process
The ideation stage of the process is all about generating as many ideas as possible for how to solve or address the problem you’ve identified in the first two stages.
At this point, as cliché as it might sound: no idea is a bad idea! 💡 You can worry about budget, business goals, and any other considerations or constraints later. The feasibility of the idea isn’t the most important thing right now. You can take your wild and wonderful ideas and rein them in to the point of feasibility once you have the idea on your radar.
If you go the other way around and prioritize what’s “realistic” or feasible, you’re likely to generate relatively tame ideas that lack originality or will fail to connect with users in delightful ways. In other words, you might not spot those wild and wonderful ideas in the first place 🤩
As Don Norman explains in Rethinking Design Thinking:
“It is by questioning the obvious that we make great progress. This is where breakthroughs come from. We need to question the obvious, to reformulate our beliefs, and to redefine existing solutions, approaches, and beliefs.”
3. Essential UX ideation techniques
Now that you understand the essence of this stage, let’s look at some basic ideation techniques before we go through an ideation session step-by-step.
Keep in mind that there are countless ways you can go about generating ideas, and this list is not by any means exhaustive. But it’ll give you an idea of how many ways this stage of the process can unfold.
Brainstorming and bodystorming
Brainstorming is the most basic form of ideation and it’s one you’ve probably already practiced at some point in your life. If you’re brainstorming with a group, you might sit around a table and share ideas as they come up, bouncing one idea off another and even combining this with a little mind-mapping (which you’ll learn about in just a moment) if it feels right. 🧠 It’s conversational and generative—you never quite know what direction it will take!
The same can be said of brainstorming on your own. You might go for a walk and think through scenarios or solutions, following one thought to the next until you land on the one that lights up with possibility 💡
You could also set up some audio or video recording and just talk through your ideas out loud! 🎧 You might feel silly at first, unless you’re well-practiced in talking to yourself, but it can be helpful to hear the ideas out loud and follow them wherever they lead. If you’re a person who needs to physically move around to get their ideas flowing, pace around your work area or do some jumping jacks, yoga, or other form of movement.
If you want to put yourself in the headspace and context related to the problem you’re trying to solve, you should try bodystorming. In bodystorming, you set up an experience or scenario that resembles the problem you’re solving. Involve other people or props, move furniture around, and use your imagination. By changing your environment and replicating the context of the problem, it can be easier to spot solutions!
Brainwriting and brainwalking
Brainwriting on your own looks a lot like journaling or freewriting—you write without filtering your ideas. In essence, this is brainstorming on paper. In a group, you could simply set a timer and have everyone write down their ideas, then pass their idea to the next person who then reads the idea(s) and adds their own. Do this for a set period of time and you’re bound to come up with loads of ideas! When you’re done, review all the ideas and decide which ones seem most actionable or worth pursuing.
In brainwalking, you do the same thing with a group, but you put sheets of paper at different places in the room. When a set amount of time passes, participants rotate to the next sheet of paper to read the ideas and add their own. This gets the brain and the body moving!
Crazy Eights
Crazy Eights is an ideation method most commonly used in groups, but you can also do it on your own! In fact, later in this tutorial, you’ll have the chance to try it out for yourself.
The goal of Crazy Eights is to generate several ideas in the form of rapid sketches. You take a sheet of paper (per participant) and fold it into eight sections. Then you set a timer and start sketching out ideas—usually one minute per sketch. The sketches don’t need to be perfect—just enough to roughly capture what the idea would look like in the end.
If you’re doing this in a group, you can take time afterwards to vote on your favorite ideas—and the most voted ideas get follow-up to see which ones are the most feasible and effective.
Mindmapping
Mindmapping is a method that’s often used during or after a general brainstorming session to create a visualization of the ideas that come up. If you ever had to create a writing web for a project in school, the concept of mindmapping will be familiar to you. It’s simply a visual map of your ideas that draws connections and highlights patterns in the ideas.
SCAMPER
While the SCAMPER method isn’t as useful to you for this course, it’s commonly used in the industry and so it’s important to mention. This method is most useful for products that already exist—they’re already live and being used in the real world, but they need to be improved. If you’re feeling adventurous, you can try to apply it to your work at the end of this course!
SCAMPER is a mnemonic that takes you through seven different ways to reimagine a product:
Substitute: What element within the product can be swapped with something else and what would happen?
Combine: What can be combined and how would this affect the product?
Adapt: What aspects of the product can be adapted to a different context and how?
Modify: What can be modified to improve the product?
Put to other uses: Are there any other uses this product can serve?
Eliminate: Is there anything within the product that can be removed to make it simpler?
Rearrange or reverse: What can be reversed or rearranged to make this product better?
Want to learn some more ideation methods? Here are five design thinking exercises that every UX designer should be familiar with.
4. Ideating alone versus with a group
We’ve designed this course to work well for the solitary UX explorer, so you can tackle the next section on your own just fine! But you can also invite a friend or colleague into the process. All of the ideation methods we cover can be adapted for independent work or group ideation.
Ideating on your own
There are two clear perks to ideating on your own: simplicity and speed. You’re the one in charge! You pick the ideation method(s), and you get to decide what questions to ask, which ideas to follow and see where they might lead, and ultimately where to land with your “final” idea. And because you don’t have to coordinate with other people, seek to understand their ideas, or navigate contradicting ideas or viewpoints, it’s usually a lot faster to work on your own.
🪄 Here’s another great area of UX design that AI can be used to assist you! Tools like ChatGPT or Notion AI can be used to help you brainstorm and generate new ideas.
ChatGPT is a generative, pre-trained language model that offers incredibly human-like responses in conversational contexts. That means it can be very useful to assist you with research if you’re ideating on your own—think of it as an immensely fast and user-friendly encyclopedia that can also put itself in the shoes of others.
 5
5
Recommended reading: ChatGPT for UX Design: The Top 15 Prompts
The key to using AI technologies effectively in the ideation phase is to master the prompt you give the AI tool. Put simply: the better your prompt, the better the response. Prompt engineering is a skill in itself. The more you experiment, the better you’ll get at writing great prompts. In turn, the easier it will be to leverage AI tools like ChatGPT for valuable ideas, insights, and guidance.
⚠️ A word of caution ⚠️ ChatGPT and similar AI tools are only there to guide you. Review all AI-generated deliverables with a critical eye—they’re not always factually accurate, and AI is sadly notorious for perpetuating bias. Use AI to spark your own creativity and speed up certain tasks, but never to the detriment of ethical, inclusive, human-centric design. Always evaluate the output from the AI carefully before you implement it in your work.
Ideating with a group
On the other hand, pro UX designers rarely ideate alone, and working with another person or a group during this stage can be incredibly helpful and ultimately lead to more innovation. Why? Because more brains in the room usually means more ideas and perspectives on the problem you’re looking to solve.
For UX designers, group ideation often takes the form of a design thinking workshop—something you don’t need to learn now, but that you’ll certainly want to explore if you decide to take the leap and start a career in UX! And if you’re considering a career as a remote UX designer, our guide to remote design thinking workshops will be helpful to you.
5. Practical task: Run an ideation session
Now that you understand the ideation stage, and some basic ideation methods, it’s time to try it out for yourself! Here are step-by-step instructions for your own ideation session using the Crazy Eights method.
And whether you decide to ideate on your own or with a friend, we encourage you to take pictures of the process and share them with us on Instagram. We’d love to see you in action!
Crazy eights
Crazy eights is a great way to get several ideas down on paper—and it only needs to take about 10 minutes from start to finish! Read all the way through the instructions before you start, just so that you don’t have to interrupt your process.
What you’ll need:
- A room or desk area that can be distraction-free for about 10 minutes
- A blank sheet of paper, folded into eighths (like this)
- Pen (or other relatively fine-tipped writing instrument)
- A timer
- Optional: A colorful marker or pen, OR sticker dots (if you have anything like that lying around)
Goal: To generate at least eight ideas for a mobile app that would help solve the problem in your HMW statement.
Step 1
Once you’ve found your distraction-free space, settle in with your paper, timer, and writing instrument(s). Feel free to turn on some ambient music if that’s helpful to you—try some Bach or go with an Endel.io playlist like this one. As long as you’ll be able to focus and rapidly sketch out some rough ideas, you’ll be ready to go.
Step 2
Review your HMW statement so it’s fresh in your mind for the exercise.
Step 3
Set your timer for 1 minute. In that time, sketch out one idea for how your digital product could address users’ problems. It doesn’t have to be artsy or perfectly proportioned. It can be messy—in fact, it should be messy! The goal is to capture an idea and, without giving it too much rational thought, to give the idea some shape. If you want to see some examples of what this might look like, check out the example sketches from Prototypr.io.
Just one sketch in one minute. And when the timer stops, you stop.
Step 4
This step is simple: Repeat Step 3 until you have eight different solutions sketched out.
Step 5
Take 1-2 minutes to review your ideas. You might see one or two that immediately stand out as your favorites for one reason or another. Before you jump to picking your “final” idea, though, go through each sketch and use a colorful marker or small stickers to identify which parts of each sketch you like the best. If you’re doing this with another person or with a group, everyone can go around and “vote” on their favorite parts.
What you’ll end up with is at least eight ideas (or 16, 24, etc., if you have more people involved!). And who knows? You might end up picking one whole sketch as the idea to go with, or you might take your favorite parts of several sketches and combine them as you move forward in the process.
6. How to know which ideas to keep or toss
After a solid round of ideations, you’ll likely have more than one or two interesting ideas on the table. How do you know which ideas to keep and which ones to throw away (or save to explore at a later date)? How do you decide which idea you’ll carry forward to the next stage of the process? What if there’s something about each of the ideas that you like?
In general, the best idea is one that:
- Clearly and specifically addresses the user needs you’ve identified during your research
- Can reasonably be implemented with the time and resources you have available to you (for the purposes of this course, imagine that you have a team of developers who can make the magic happen!)
- Tackles the problem you’ve defined without creating other problems/issues that impact the feasibility of the project
- …and it’s a bonus if the idea has the potential to even delight users!
So take a moment to review the ideas you’ve generated during this tutorial. Which ones seem the most promising according to these criteria? Whittle it down to your top 1-2 ideas, or start thinking about how you might combine some of your favorite elements. You don’t have to decide on one idea just yet. Get started on the next UX design tutorial, learn a little about prototyping, and then you can let the idea take a more “final” shape.
7. Summary
- The ideation stage is all about generating creative ideas for practical solutions to the problem you defined in your HMW statement.
- Early in the ideation stage, no idea is a bad idea. It’s important to simply generate as many ideas as possible. You can sort through and evaluate them later!
- Do everything you can to push past your assumptions and any set ways of thinking about this problem or its most obvious solutions. Working with an established ideation method will help with this.
- There are many types of ideation methods that you can use—the method you choose should depend on your needs and goals as well as the problem itself and where you’re at in the project.
- Settling on one idea to move forward with can be a challenge, but the best idea is the one that clearly addresses user needs, is feasible given your time and resources, and that most interests you and/or has the potential to delight your users.
8. What to do now
Well done! You’ve successfully wrapped up the first three stages of the Design Thinking process, and your third tutorial in the course.
Want to show off your Crazy Eights ideas? Post your sketches on Instagram and tag CareerFoundry! We’d love to see how it’s going.
Take a moment to reflect on everything you’ve done so far, treat yourself to a nice cup of tea, and we’ll see you in the next tutorial for some prototyping!