Welcome to the first tutorial of your software engineering short course, and congratulations on taking your first step towards becoming a fully-fledged software engineering!
Introduction
In this course, you’ll learn all about becoming a software engineering, from the responsibilities that a software engineering performs on a day-to-day basis to the set of skills that you’d need to succeed in such a role. And, of course, you’ll also get your hands dirty with code: We’ll introduce you to the fundamental building blocks of the web and make sure you leave this course having developed your very first website!
What are we going to do in this tutorial?
- Learn what the role of a web developer is and discuss the different types of web developers
- Take a look at the skills required to become a web developer
- Preview what we’ll be learning over the next 5 tutorials
- Create your first webpage using a text editor and browser
Ready to dive into the magical world of web development? Let’s go!
1. Who is a web developer?
A web developer is at heart an interactive artist. They’re someone driven by a deep desire to create things. A web developer’s canvas is a user’s web browser.
Much like how a curious child takes pleasure in making toys by joining LEGO blocks—and then experiences a similar joy in taking things apart to see how they’re made, a web developer’s job is to use the basic building blocks of the web (like HTML, CSS and JavaScript) to create something complex like a webpage. Don’t sweat it! We’ll get into all of those terms soon.
It's also the web developer’s job to diagnose problems in a website’s functionality, to understand how something works by reading the code behind it, and to make changes to fix any issues. That essentially makes web developers the physicians of the world wide web. When we talk about the world wide web, we’re mainly referring to websites and web applications. At this point, the curious aspiring developer in you might be wondering, “What’s the difference between the two?”
Well, we’re glad you asked! A website is usually a simple page or a group of pages (the popular web comic site, xkcd, for example). However, modern websites are much more than that. Take Google Docs, for example. It has a nice interface that, once opened, looks very much like a desktop software like Microsoft Office. Such complex websites are often termed web applications. A web developer today is expected to know how to create and work with web applications. Having said that, most people use the terms interchangeably, so don’t get too hung up on the terminology!
Types of web developers
There are different types of web developers who focus on different areas. These include:
- Frontend developers: Frontend developers implement web page designs using HTML and CSS. They make sure the website looks pretty on different devices, and that the forms and buttons work.
- Backend developers: Backend developers create the backbone of the web application. They write code logic that handles a user’s input (for example, what should happen when you click the signup button after filling in a form).
- Full stack developers: Full stack developers do bits of both backend and frontend. Depending on the problem at hand, they can switch cape 🦸♀️🦸♂️ and move stacks. You can learn more about the differences between frontend and backend development in this guide.
There are many other specific roles in web development, like system architects, AI developers, machine learning and security engineers. These roles require more specialized knowledge of one or more of the above types of development, so many professionals in these roles will start by gaining some general web development experience.
2. What are the skills required to become a web developer?
What does it take to become a web developer? Essentially, just three things: HTML, CSS and JavaScript—the three pillars of the web, which we’ll be learning about over the next few lessons.
Together, these three pillars make every website work, defining the content to be displayed (HTML), telling a browser how to display that content (CSS), and making the content interactive (JavaScript), respectively.
A web developer is well versed in these three technologies. They can read other people’s code and make changes to it. They can find and debug bugs (shortcomings in existing code). A web developer might, at times, work on a new project (a new website) from scratch, or may have to work on an existing website and make it better. A typical day in the life of a web developer involves fixing bugs, developing new features (that is, enhancements) and webpages, and working with other developers to discuss ways to solve problems.
Don’t be overwhelmed by all of these details. You’ll soon see that they’re all very connected, and learning one of these automatically makes you good at a few others!
What’s the job outlook like for web developers?
In short, very good. Employment of web developers is projected to grow 16% from 2022 to 2032, much faster than the average for all occupations. Demand will be driven by the growing popularity of mobile devices and ecommerce (Bureau of Labor Statistics).
While 2022 and 2023 brought with it news of tech layoffs due to over-hiring post-pandemic, web developers and software engineers looked further afield and found opportunities in a whole range of industries, from healthcare to finance.
Why AI won't replace developers
If you’re thinking “AI is going to wipe out web developer jobs” you’d also be mistaken. In his New Yorker article on whether coding is "over", seasoned programmer Jason Somers examines the impact of Chat-GPT and AI on development, and concludes:
Computing is not yet overcome. GPT-4 is impressive, but a layperson can’t wield it the way a programmer can. I still feel secure in my profession. In fact, I feel somewhat more secure than before. As software gets easier to make, it’ll proliferate; programmers will be tasked with its design, its configuration, and its maintenance.
This is echoed on the CareerFoundry blog, in our experienced software engineer Nicole Abramowski’s profile of the future of AI and web development. Nicole states that basically, to work effectively with AI in coding, you'll still need to have a solid grasp of the fundamentals. She says:
In the end, working with AI is all about asking good and specific questions. If you don’t understand how different technologies work, and their use cases, you won’t be able to write good prompts.
So, if you don’t know the fundamentals, how will you know if the information is correct? And this is where these tutorials come in!
3. What we’ll be learning in the next five tutorials
No software engineering course is complete without a hands-on project. In this course, we’ll be using the three pillars of the web (HTML, CSS, and JavaScript) to build your first project, a personalized portfolio website.
Once you have these under your belt, picking up other tools and languages is much easier. Pay extra attention to the basics, as a shaky foundation leads to loads of confusion later on. We’ll also give you the resources needed to put your website online so that you can share it with your friends and family.
For now, we’ll start by getting a bird's-eye view of the software engineering world. We’ll talk about the tools we’ll use in this course, and we’ll also write some HTML.
In the second lesson, we’ll write more HTML and HTML elements, and create the rough layout of our project website.
In tutorial three, we’ll write some CSS to make our website mobile responsive, which means that our website will be viewable on computers, tablets, and mobile phones.
In lesson four, we’ll dive into some advanced CSS and add cool effects to our page.
In the fifth and final tutorial, we’ll learn how to write basic JavaScript. We’ll also look at form validations and other common elements of JavaScript programming.
To give you a tiny glimpse, this is roughly how your website will look like at the end of this course. Pretty cool, right?

Ready to get started? Let’s begin by setting up your developer environment.
Setting up your coding environment
For this course, we’ll need two tools that every software engineering uses:
- A text editor to write code
- A web browser to see what we’re building
While you can use any web browser or text editor, we recommend using Google Chrome and Sublime for this course.
- Google Chrome can be downloaded from https://www.google.com/chrome/
- Sublime Text can be downloaded from https://www.sublimetext.com/3.
Like any good craftsperson, it’s important that you know and understand your tools. For that reason, let’s take a brief look at what we have so far.
Google Chrome
Google Chrome is a web browser. You may or may not already be using Google Chrome for browsing the web.
A web browser allows us to view webpages (similar to the one you’re reading this very text on). We’ll use Google Chrome to view the results after writing and making changes to our code.
Sublime Text
Sublime Text is a popular text editor. A text editor is a very aptly named piece of software; it helps us edit text. It's similar to the default text editor that comes preinstalled on Mac or Windows, but has additional features like code highlighting to enhance our coding and debugging experience.
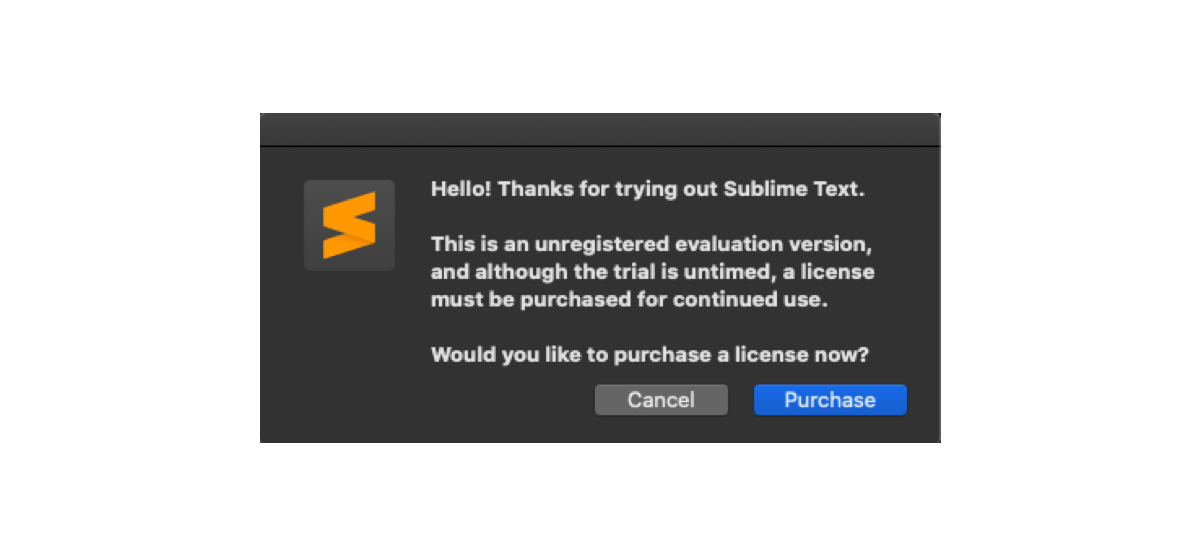
⚠️ Watch out! Sublime Text is a paid software with an unlimited trial period. You’ll occasionally see a dialog box popping up prompting you to pay for the software license. You can pay for it if you wish, but you don't need to just for this course.
This course is OS independent, meaning that you can follow it on Windows, Mac OS or Linux.
😎Pro tip: If you get stuck when installing Chrome or Sublime, or see any error messages, it's best to do a web search (try a Google or DuckDuckGo search) for the exact error message. It's likely that other people have had the same problem before us and a solution already exists.
After downloading, install it according to the instructions you’ll find on those websites. Once you’re done installing, you’re ready to move to the next section.
4. Your turn: Creating your first webpage
We’ll now use the tools that we downloaded and installed in the previous section to do our first development work, creating our first text on a webpage. We’ll use HTML for this purpose. Let’s talk about HTML quickly before we start creating our first page.
HTML stands for HyperText Markup Language. In a nutshell:
- Hypertext simply means text that can jump from one point to the other. If you have ever clicked a link on a page (try this: google.com), you’ve used hypertext.
- Markup is simply a way to structure content so that we can distinguish between different blocks of text.
- Language means a, umm, language. Computer languages are similar to real world languages like English and German, just very strict in their syntax.
HTML lets us structure our page and the data in it. Once we have a structure and data to work with, we can focus on style and functionality.
Okay, that’s enough theory for now. Let’s get right into it by opening Sublime Text.
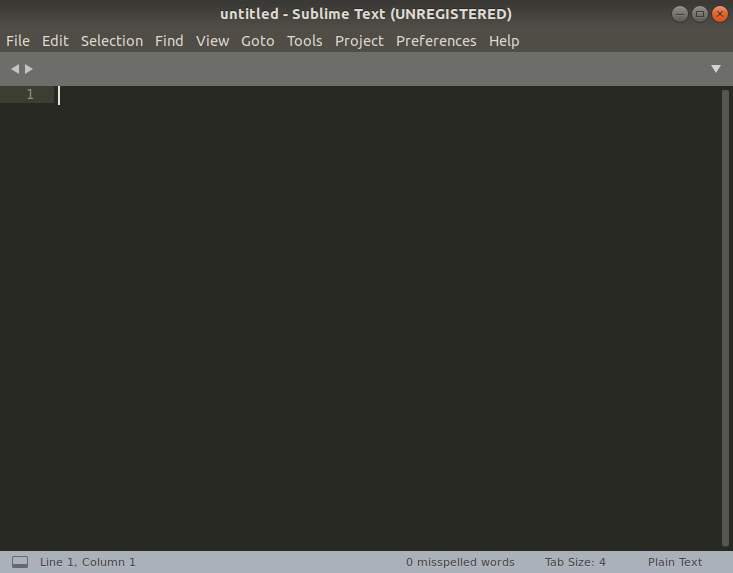
⚠️ Watch out! Students frequently get stuck at this step, so take it slow.
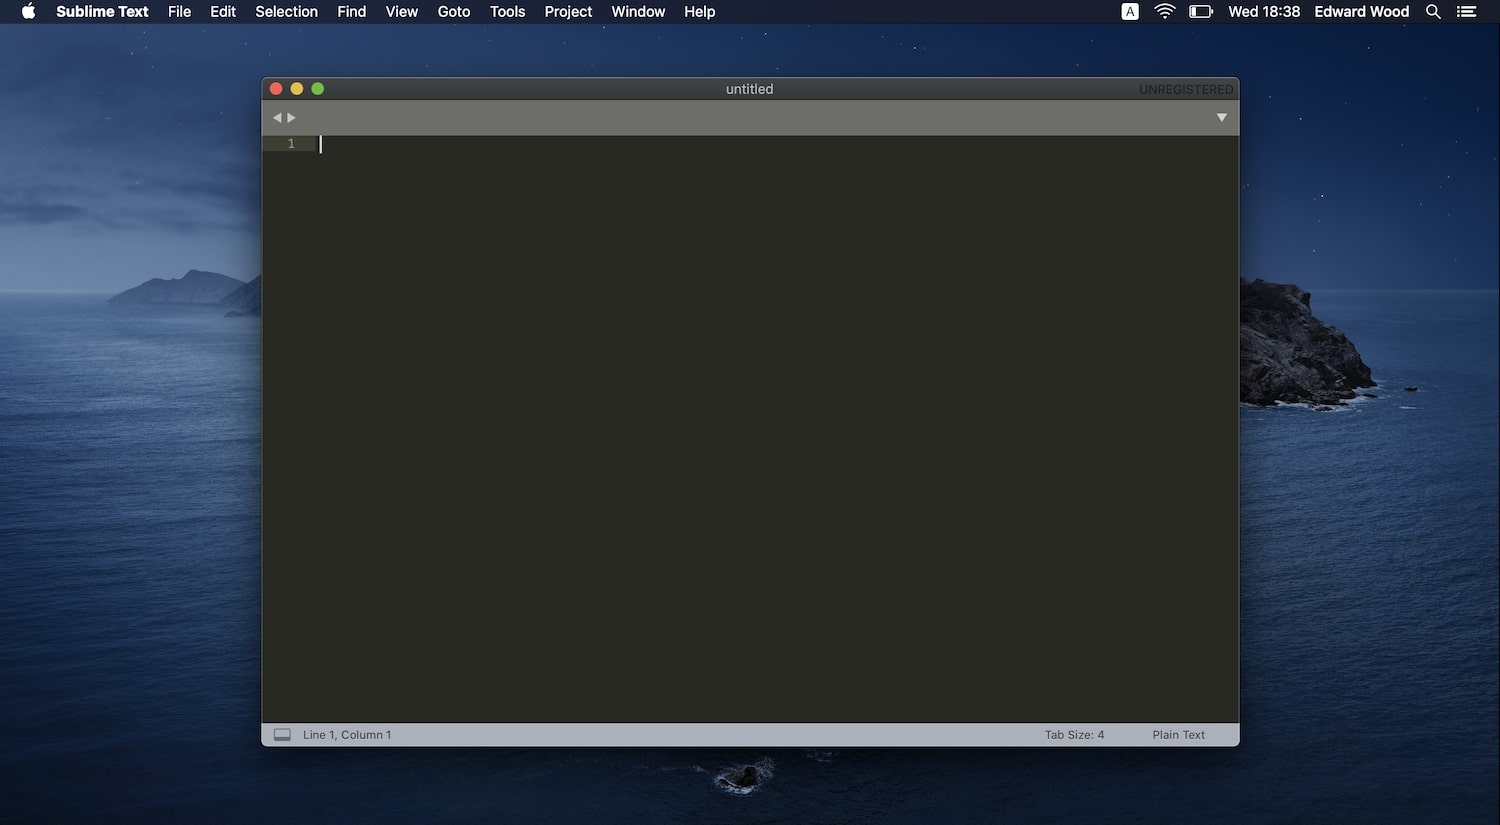
Click File > Open Folder (or simply Open… if you are on MacOS). Notice that on MacOS, the toolbar is at the top of the screen (as shown in the screenshot below).
Once you select File > Open / Open Folder, it will open a new window that will allow you to select an existing folder or create a new folder. Navigate to your ‘Desktop’ and create the folder there. Creating the folder on your Desktop makes it easy to find later on.
Click on the little icon that allows you to create a new folder. It can look different on different operating systems.
On MacOS, it will look like this:
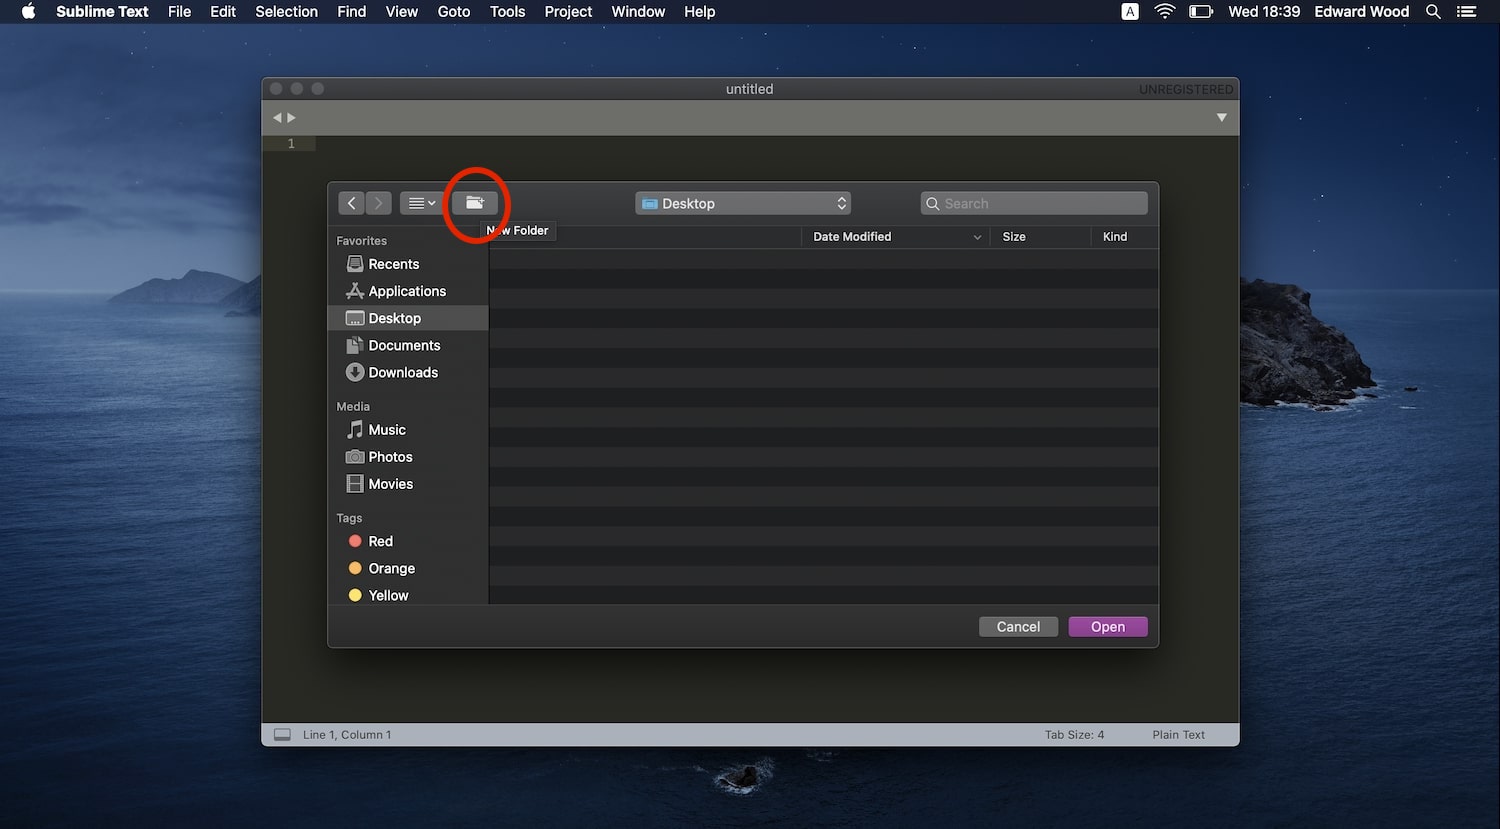
While on Linux, it will look like this. If you click it, you’ll be able to create a folder by giving it a name.
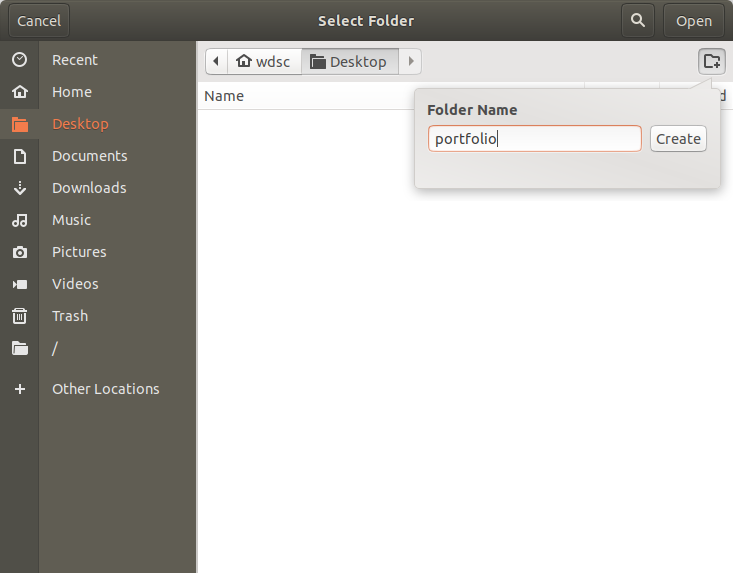
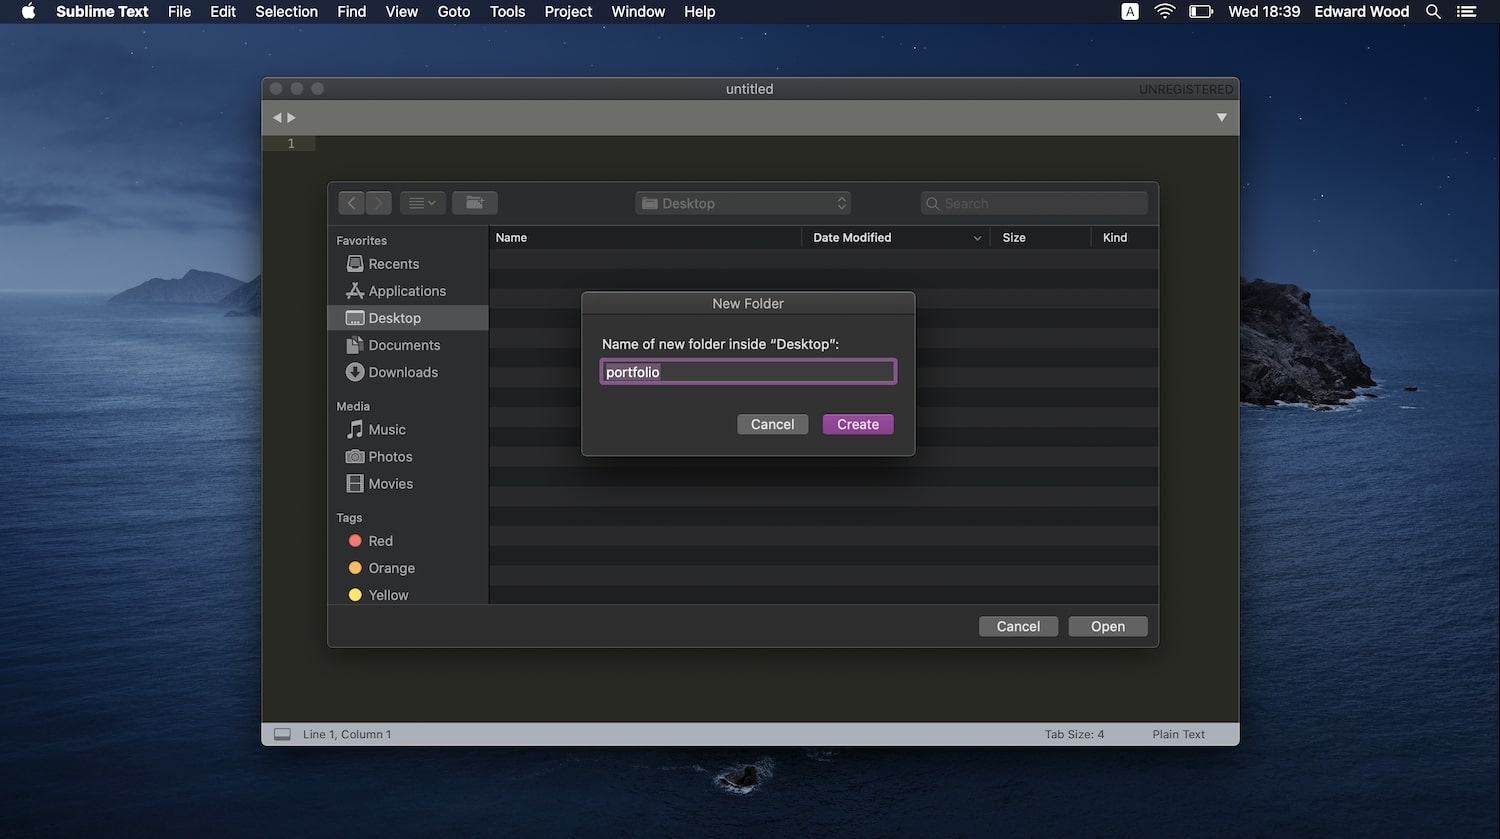
We’ll name this folder portfolio because that’s what our project is, but feel free to choose a different name.
⚠️Watch out! While it's not strictly required to follow the naming scheme that we use, we recommend you stick to our way for this course. This will make it easier to follow the course later on when we work with multiple files.
If all goes well, you should see a screen like the following.
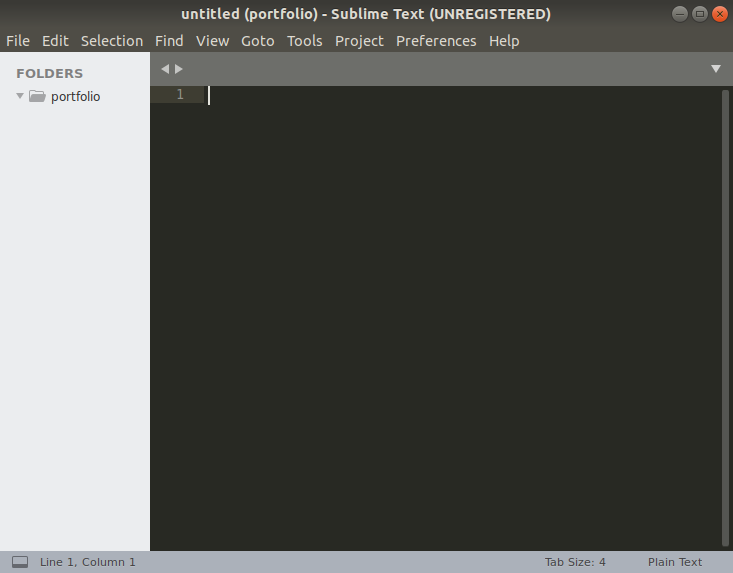
From here, right click on portfolio in the left sidebar, and click New File. You should see a new file labeled “untitled”. That’s okay, since we’ve not named it yet.
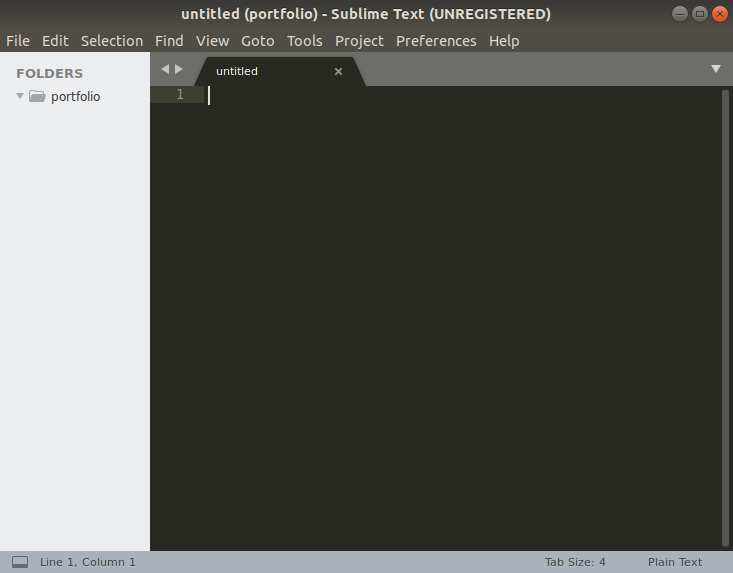
Let’s save the file. Click File > Save and you should get a window asking you to enter the file name. Here, enter index.html and click save.
We name it specifically ‘index.html’ as per convention. By default, the entry point into a website is called the index page, hence the name.
Also, make sure you save the file inside the portfolio folder. Here’s what you should see now.
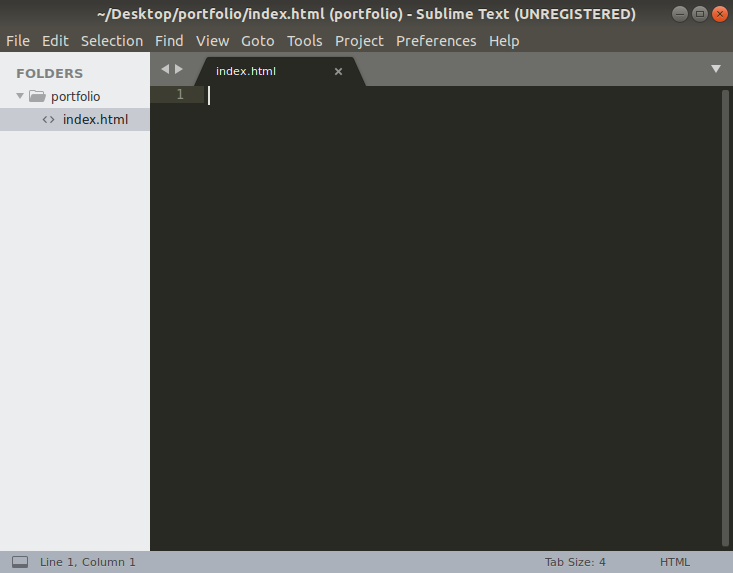
Now it’s time to write our first few lines of code! In this lesson, we’ll just get our page up and running. In the next lesson, we will dig into the meaning of each line, talk more about what HTML is, and put more structure into place.
🙋 Just a heads up: The code snippets in the video might not match exactly with the code snippets in the tutorial text. That’s okay—in programming, there is usually more than one correct way of accomplishing the same result. Rest assured, you’re learning the same concepts!
So let’s get started coding your first webpage. Type the following code as is into your index.html file:
Done already? Good. Here’s how it should look on your screen.
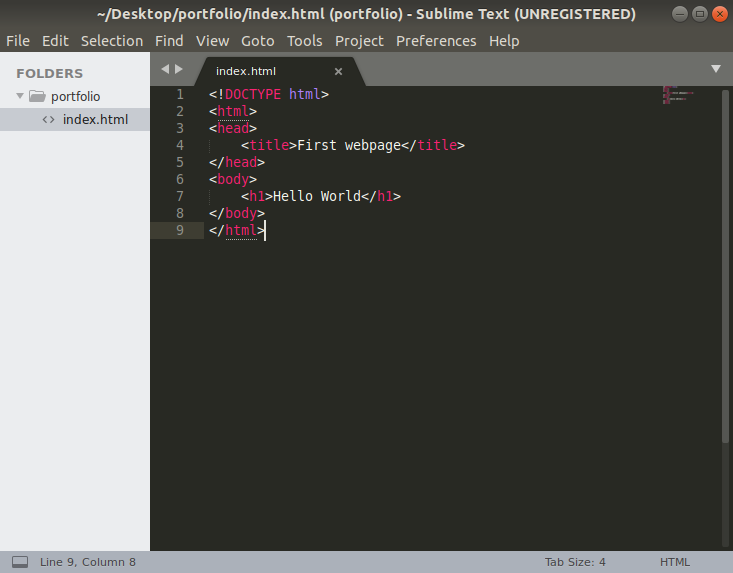
Okay, good work! You just wrote some real HTML code. It’s time to see how it looks in a browser. This is called running the code and we’ll be doing it all the time in this course.
To run your HTML, open the Google Chrome web browser that we installed previously. Once there, press Ctrl+O on Windows and Linux or Cmd+O on Mac to open the file explorer dialog box.
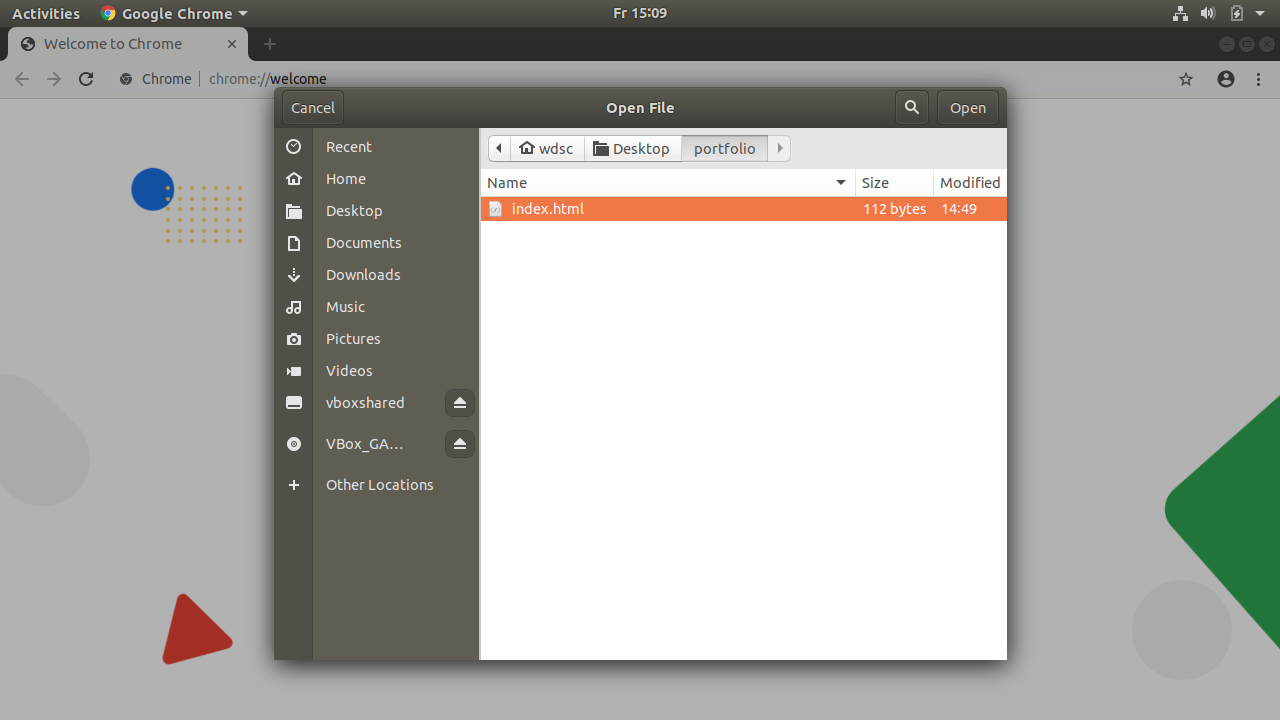
Navigate to the Desktop and then portfolio folder and you should see the index.html file that we just wrote some code in. Open that file and you should see something like the following:
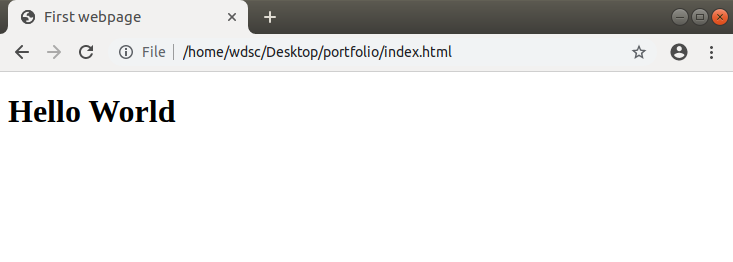
If you see the above page, give yourself a pat on the back. You just created your first functional webpage. Notice where the text “First Webpage” and “Hello World” appear.
Let’s go back to Sublime Text and try to change the Hello World on line 7 to Hello World, check out my website! Save it and refresh the page in Chrome. You should see an updated version of the text.
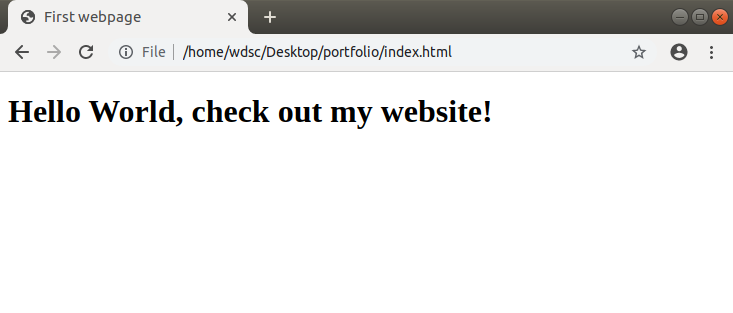
Congratulations! You just created and edited your first webpage and viewed it on your browser. With this, you’re well on your way to building your first website.
Aside on “Github commit URLs”
Throughout this course, you’ll occasionally see a Github (https://github.com) link, like the one above. Github is a website that developers (and even non-developers) use to host code projects, and share it with others. Each change (for example, change to our heading) is called a ‘commit’ and the link under the images will take you to the corresponding commit.
This link will take you to the exact point in the project’s history and show you what has changed. For example, the above link shows that the line in red was removed and the line in green was added. That’s the change we made.

As your projects grow, this becomes very useful and we’ll use it extensively throughout this course.
And with that, our first tutorial comes to an end. Good work!
Summary
In lesson one, we learned what being a web developer means and the different sub-roles in web development. We also got a bird’s-eye view of the web development technologies that we’re going to study later in the course.
Then we installed the necessary tools and got our computers ready for the next couple of lessons in this course. We also created our first webpage, made edits to it and learned how to ‘run’ our code. That’s really good progress for step one! Next, we’ll dive into some syntactic aspects related to HTML, talk about all the HTML elements that we’ll be using in our course and create a basic structure of our portfolio page in HTML.
But wait, there’s more! If you’re feeling motivated and want to add more types of text to your webpage before the next lesson, why not give the practical challenge a try?
🧐 Practical challenge
Did you notice how the text on line 4 (<title>First webpage</title>) and line 7 (<h1>Hello World</h1>) appear in the tab name and in bold on the page respectively?

title and h1 (heading 1) are what we call HTML elements. There are many more such elements, like p (paragraph), h2, h3..h6 (heading 2, heading 3…heading 6) and strong (bold text).
For your first challenge, try adding the following tags to your page with your own content
- h3
- strong
- p
When you’re done, your page should look something like this. The text inside the tags (“I am an explorer”, for example) can be customized to be whatever you want.
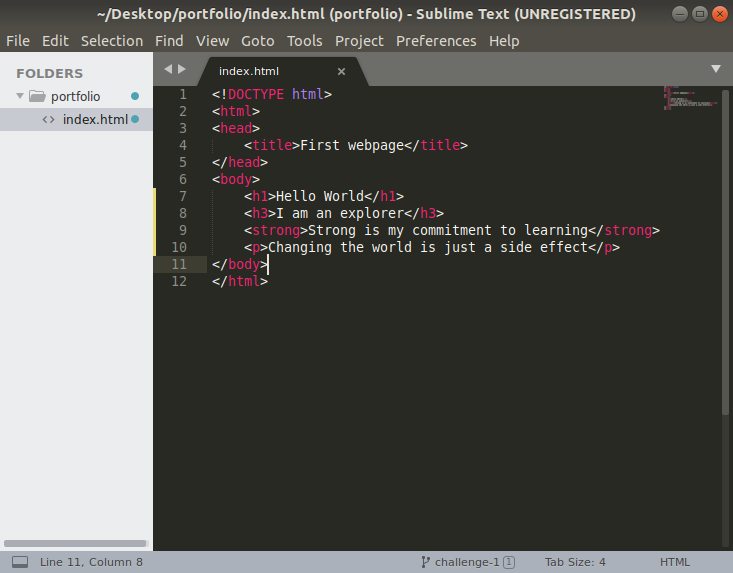
Your job is to write it as shown in the picture (maybe with your customized text) and explain to yourself what h3, strong and p elements did. If you were successful in getting everything to work, post a screenshot and tag @careerfoundry on Twitter.
🙋Solution
Did you figure out what each tag does?
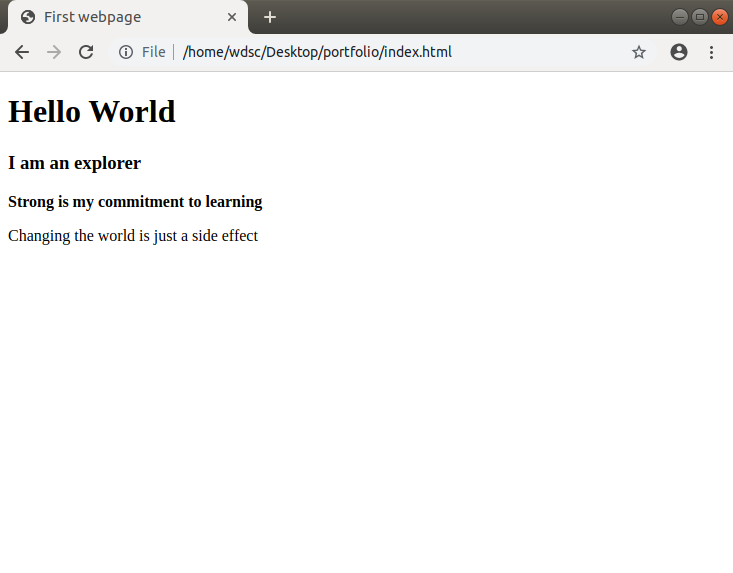
h3 is a heading, just like h1, but less important (and looks smaller). strong makes the text appear bold. p is short for paragraph, and is used for textual content.
📗References
❓ FAQ
Q. I’m still not able to figure out how to create a new folder on my desktop. Can you help me out with that?
A. If you’re not able to create a new folder via Sublime, you can create it using your File Manager (like Finder on MacOS). What’s important is that the folder gets created and you can open it up in the Sublime Text editor.
Q. Can I use Atom / Nodepad / Wordpad / Google Docs / ‘X’ to write code and Firefox / Safari / Opera as my browser?
A. While you can use the tool of your choice, we recommend that you to stick to the tools we use in this course. Once you get the hang of it, you can choose whatever works best for you.
Q. I didn’t understand the code that we wrote in this tutorial. What is h3 and strong? How does it work?
A. Don't worry. We’ll learn more about HTML in the next lesson and these questions will be answered for you.
Q. I am getting a ‘Your file was not found’ message on a dark and dull screen
A. Most likely you didn’t open the right file, or entered the wrong file path. Check it again and try doing it exactly as we did in the course.
Q. Why are we building a portfolio website and not an online game / animation / social network?
A. Given that this is an intro course intended towards newcomers to software engineering, we want to touch the important aspects of the software engineering scene and give you a feel of real world software engineering, but at the same time not overwhelm you with too many details.
🦉Feedback
If you have questions or feedback along the way, you can simply reply to any of the course emails you receive to share your thoughts with us. We’d love to hear from you!