💬 "Every great developer you know got there by solving problems they were unqualified to solve until they actually did it." (Patrick McKenzie)
Introduction
Welcome to lesson two of your software engineering beginner’s course. This is a deep-dive into HTML!
HTML is all about structuring the data. It doesn’t concern itself with how something looks; that’s what CSS is for, which we’ll study in the next lesson.
Just like a building is only as strong as its foundation, HTML is the skeleton that holds everything together. To put it in a more web-based context, HTML makes sure the page is usable on a variety of devices and browsers and provides a structure for adding CSS, JavaScript, and the content of the website or application itself.
What are we going to do in this lesson?
- Learn about HTML and basic HTML syntax
- Learn about the various HTML elements that we’ll use in this course
- Create the basic structure for our own webpage
Ready for another adventurous lesson of data, structure, and magic? Let’s go!
1. HTML
We’ve already learned that HTML is a type of language that structures content; in other words, it labels different elements such as images and text in order to tell your browser how to display the content and in what order.
In the previous lesson, we wrote some HTML and worked with a few HTML elements, too—but we haven’t really understood them. Let’s change that in this lesson. We’ll look into what HTML is made up of—in other words, HTML elements—and then use them to add detail to our portfolio site.
Element tags
We’ve already seen a few HTML elements. You can think of an HTML element as an individual piece of a webpage, like a block of text, an image, a header, and so on. In the previous tutorial, you used a heading element, h1, which looked like this:
Every HTML element has HTML tags, and a tag (<h1> or </h1>) is surrounded by angled brackets like < and >. Tags define elements and tell the browser how to display them (for example, they can tell the browser whether an element is an image or a paragraph of text).
Most HTML elements have an opening tag and a closing tag that show where the element begins and ends. The closing tag is just the opening tag with a forward slash (/) before the element name. We can generalize the format of an HTML element as follows:
Here, content is something we add. It can be anything, like “Hello world” in our h1 example; ‘element name’, however, has to be one of the predefined tags like h1, h3, p or strong.
Let’s take a look at a few important things to know about HTML elements before we dive in and use them.
Element attributes
HTML elements can have certain attributes that modify their functionality and behavior. These attributes are written inside the opening tag. For example,
We have an image element with a “width” attribute with the value 300 and “height” attribute with value 200, which as you might guess, will make the image 300px wide and 200px tall. Let’s look at another example.
The very aptly named textarea element will display a text input field where our users can write text. In this example, rows and cols are attributes that define the number of rows and columns the textarea should span respectively.
Attributes like width and height for img, or rows and cols for textarea are useful directly within HTML. But some attributes have a special meaning—meaning that they don’t do anything on their own, but require us to write additional CSS or JavaScript, and thus connect the three pillars together—and we’ll be learning more about them later in this course.
Note that some elements don’t have any content in them, and hence they don’t have to have a closing tag. Images, for example, only need a “src” attribute (short for source, or the location to find the image).
Notice the /> at the end (instead of </img>). This is because image elements have a source attribute (src) which fetches the image to be displayed. There’s no content that needs to go inside. There are other elements, similar to img, that don’t require a closing tag.
Nesting elements
HTML elements can be nested inside each other; in other words, one element can hold other elements. Take a look at the following block of code.
Notice how we have two strong elements in our paragraph element. That’s totally legal.
For ease of reading, we can format the previous block of code as follows:
HTML doesn’t care how much space or how many new lines you use. The previous two examples will display in the exact same way (but the latter is easier to read, so we prefer that).
Other rules
Apart from these, there are a few basic rules that apply to all HTML pages. For example, The outermost HTML element needs to be <html> itself. Similarly, all "visible" content goes into <body> while all configuration / metadata (data about the page itself) goes into <head>.
Remember our first web page’s code from lesson one?
That was the reason <title> went into the <head>, and the browser picked it up and displayed it as the webpage’s title (while it wasn’t visible inside the page).

2. HTML elements
Now that we have a basic understanding of HTML elements, let’s look at some of the elements that we’ll be using in this course.
Headings
Headings are exactly as the name suggests. In HTML, there are six headings, ranging from h1 to h6. Heading 1, or h1, is the largest and most significant heading; it signals that this is the most important text on the page. The significance decreases gradually as we move towards h6.
Anchor Links
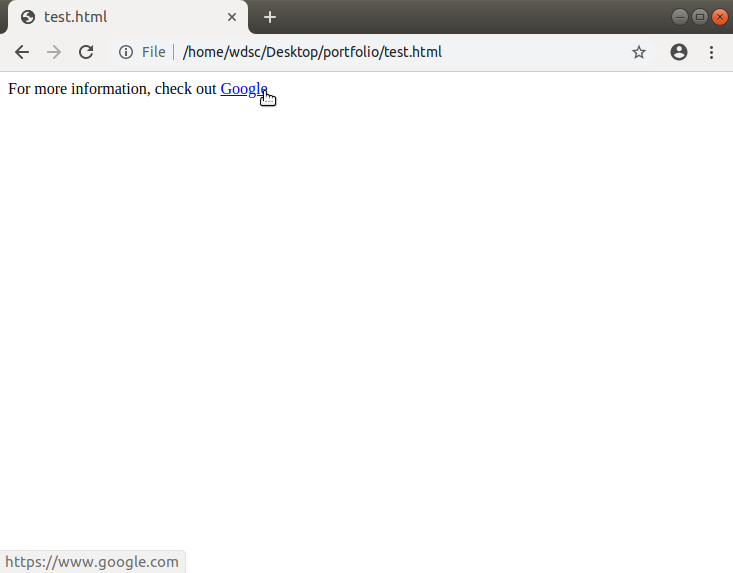
The anchor element, a, enables the HyperText in HTML. It can link to another page on the same or a different website. Here’s how to create an anchor link to Google’s homepage:
This code will display as follows. Notice how hovering the mouse pointer on the link shows the anchor href value in the bottom left corner of the page. You must’ve clicked a couple of such anchor links to reach this very page!
Paragraphs
The paragraph element, p, is used for text blocks. We usually style paragraphs such that they have a nice space between one another and between the first paragraph and its heading.
Lists
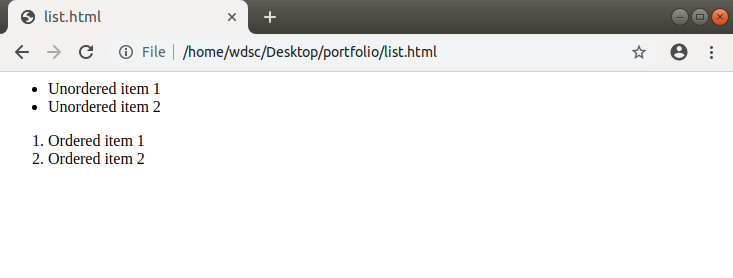
Lists are very useful for displaying data in an ordered or unordered list. For ordered lists (a list that uses numbers) we use <ol> and for unordered lists (a list with bullet points), we use <ul>. Within one of these elements, each list item is denoted by <li>. Here’s an example:
Here’s how our example ‘renders’ (which is just a fancy word meaning how it looks in our browser when we refresh the page).
Divisions and spans
Everything on a webpage can be imagined to be contained in a series of boxes. Our job as software engineere is to arrange these boxes so that the whole page looks nice on all screens. These boxes contain text, images, and everything else that we see on webpages.
The names of these boxes are divisions (div) and spans (span). Divs and spans don’t do anything on their own, but we add things to them, like text and images, and they let us position the text and images as we like.
A good analogy for divs and spans are bags. Bags like handbags or backpacks are not very useful by themselves. No one would carry an empty bag around. They become useful when we store stuff in them–they help us keep things organized. That’s how we like to think of divisions and spans. They’re containers for the actual functional elements on your webpage.
We’ll see how they work when we add them to our page below.
Forms
We fill in forms all the time on the internet. Forms and form elements allow us to accept user input. Whether it's for logging into our social media accounts or posting a tweet, anywhere you see a place to add text or click a button or toggle a checkbox, there’s an HTML form element in the background.
Are AI tools useful here?
Now, at this stage some of you might be asking "So could I have used AI tools to carry out this for me?" and the answer is "Yes, kinda, but..."
One of the most popular AI programming tools to hit the market in the past few years is GitHub Copilot. This AI tool assists developers by generating code snippets, debugging, and generally writing code more efficiently.
However, if you don't know the fundamentals yourself, how will you know if the information is correct? This is one of the reasons it's vital to learn these basics yourself, so you not only know how to get the most out of the tool itself, but to spot when the tool is "hallucinating" code (ie making a mistake).
With that in mind, let's get down to it!
3. Your turn: Creating the basic page layout
Now we know enough HTML elements to start adding HTML to our portfolio page project! Before we get into writing code, let’s take a look at our wireframe. A wireframe is a low fidelity design that we use as a reference to code our website.
In the real world, your team may have dedicated designers who’ll come up with a design that's then handed over to you, the developer, for implementation (converting into actual code). In our case, we’ll use a hand drawn design as a starting point. The purpose it serves is similar: it gives us a broad outline for how our end result should look.

Looking at the mockup, we can roughly compartmentalize our page into sections.
- Introduction
- Profile picture
- Name
- Professional title
- Quote
- About
- Who I am
- What I like
- Portfolio
- Links and contact form
It's generally helpful to think in terms of sections, because as you’ll see, each of these bullet points will become a box in itself, with the sub points getting nested inside the main points. Let’s take each of these points and tackle them separately.
Introduction section
The introduction section contains an image (profile picture), a heading (name), a subheading (professional title) and a line of text (quote). We can start with the introduction box and add each of the nested elements into it. Note that this code goes inside the body tag, that is, in between the opening and closing body tag (<body> and </body>).
Remember what we said about the div element? It’s just like a box that holds our content together. Inside the box, we have all the elements we mentioned above.
Notice the https://via.placeholder.com/150 in image source (<img src=)? That's a placeholder image (in this case a 150x150 gray box) that we use while we’re developing this website. We can replace it with our own image later once we’re happy with our design.
Let’s see how that looks in a browser.
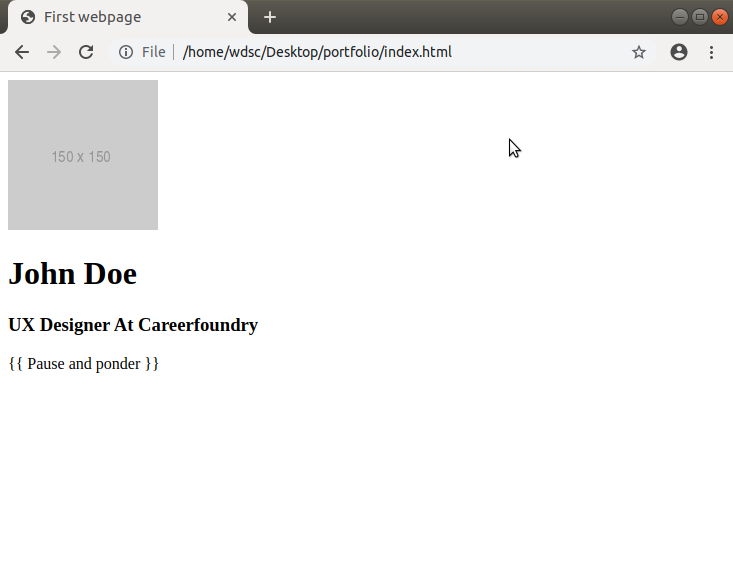
Did you get that? That’s right. We have the first section of our website ready. You can see your code in the browser if you press Ctrl+F12 (in Windows or Linux) or Cmd+F12 in Mac OS.
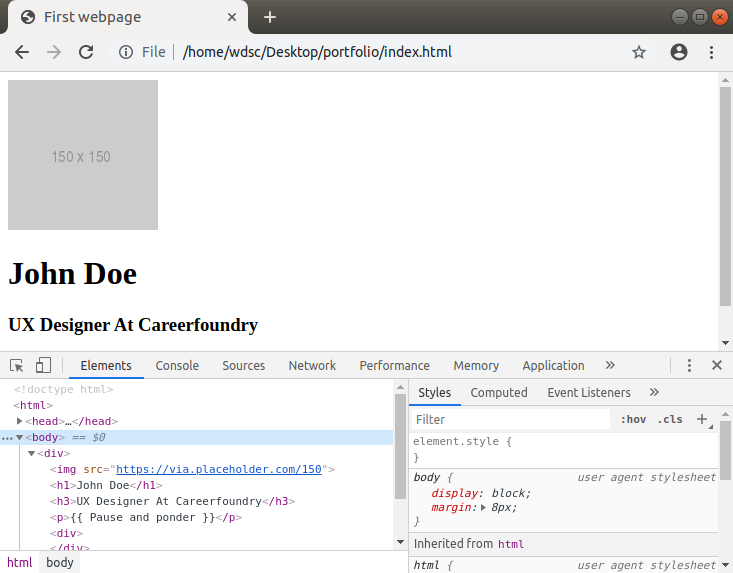
This is the code that your browser interpreted. You can try clicking on each element (img, h1, etc) and see that the browser highlights them for you.
😎Pro tip: This window that popped up in our browser is called the developer tools menu and is used extensively in real world software engineering for checking code and debugging bugs. The best way to get used to this new tool is to play around with it.
About
Next, let’s look at the About section. It has two lists and a heading that goes with each list.
Notice that this time we have two boxes (divs) nested within this one larger box. These are the left and the right box, each with its own heading (<h3>) and an unordered list (<ul>). Let’s write code for that just after the ending tag of the previous (Introduction) section </div>.
Let’s look at the result of that in our browser.
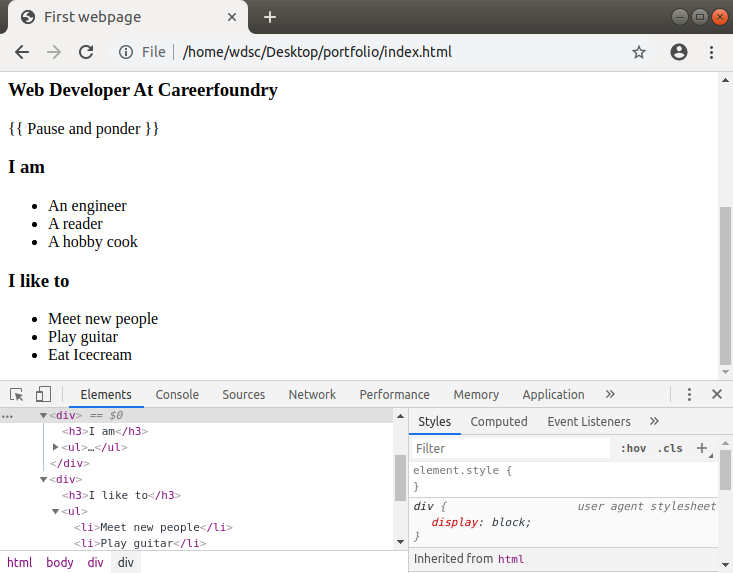
Here’s a quick reminder: You can click the above Github link to see the exact change that was made. We recommend that you first try to write the code yourself and only look at the Github link if you’ve gotten stuck.
Portfolio
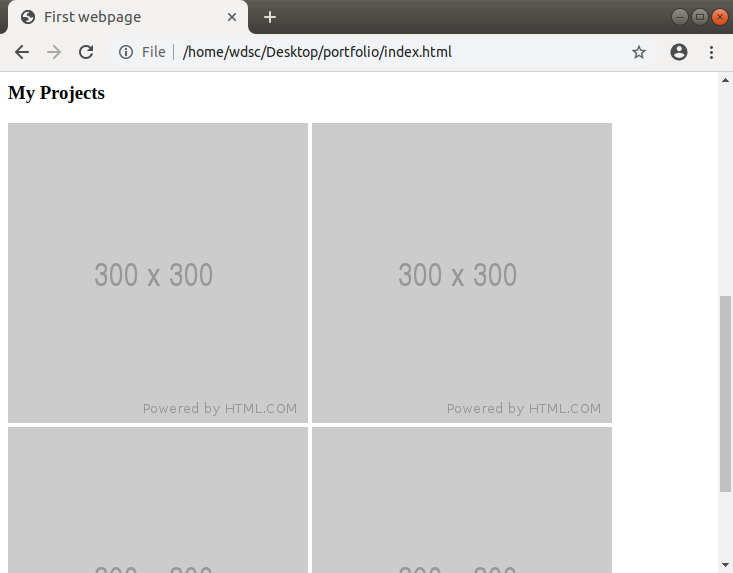
Great! Now let’s tackle the Portfolio section. This section will contain four of our chosen project screenshots.
You’ll see in our wireframe that we’re planning to arrange them in a 2x2 grid. We’ll be able to do that with CSS later in the course. For now, let’s add a heading and four images using the <img> tag just below the previous section.
Notice we’re again using placeholder images here (but we’ve made them 300 now, which is their size, length and width, in pixels).
The result, after adding to our page, should look as follows:
Links and footer
Our final section is our footer (so called because it's the vertical end of the webpage). It contains some links to our online social profiles, like LinkedIn, Github, and X (formerly Twitter), but you can replace them with your own custom links if you’d like!
Note the <user> placeholder in the href attribute of the anchor element. You have to replace that with your respective usernames for those sites. For example, https://twitter.com/<user> will become https://twitter.com/careerfoundry to link the anchor element to CareerFoundry’s X page, and similarly for other links. ** **
Place this section after the closing div tag of the Portfolio section.
Contact form
We’ll also have a ‘Contact me’ form with input fields. On a real website, it would enable people to send us a message. For now, the form that we’re writing is just on the frontend. It won’t work since we do not have a backend for it yet.
We’ve introduced a few elements for the first time here. Let’s look at them one by one and understand what is happening in the lines of code above.
1. <form action=”#”>
- Form element defines an HTML form, which is what you use to login to Twitter or type in a message on Facebook. A form may have one or more inputs, buttons, checkboxes or dropdowns.
- A form can be ‘submitted’, which signals the browser that the user has done entering data into the form. The action attribute is the location where data needs to be sent when the form is submitted (which is our case is ‘#’, because we do not want to send the data anywhere).
2. <label for=””>
- Label marks the label for an input element. It can be the text next to the input fields, or an icon. The for attribute takes in the ‘id’ attribute of the enclosed input element.
3. <input type=””>
- Input defines an input element (an element take accepts data from the user). Input element has a type attribute which takes in many values. For example, type=”text” will render a text input field, while type=”submit” will render a button that submits the form when we click on it.
4. <textarea>
- As discussed already, textarea element will render a larger box to write text in. Follow the next section and try figuring out what’s the difference between <input type=”text” /> and <textarea>. Hint: One of the two accepts multi-line text input.
Putting the footer together
Just like with the About section, we need the links box and comment box to be aligned side by side, links on the left and comment box on the right.
For now, we’ll need to add an opening and closing ‘div’ around these two sections, essentially wrapping each of these boxes in a bigger box. The end result should look something like this:
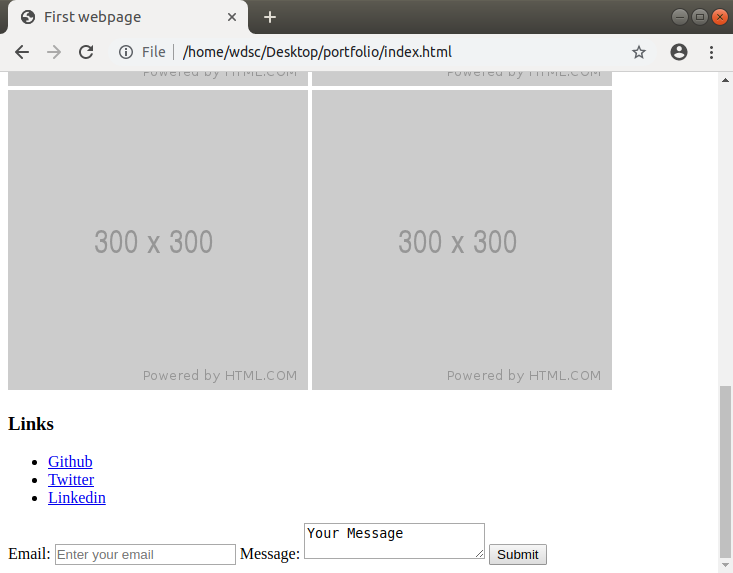
That’s it! We have the links section and then we have our inputs. Try typing something into the form fields and click "Submit". Did you notice any change? Yes, the address bar of the browser now has a "#" pound/hash symbol. Remember where we used it? The form’s action attribute!
Summary
That just about concludes tutorial two! We learned about various kinds of HTML elements. We created our first webpage and added the structure and information that we'll work with throughout this course.
What we did in this lesson is what you’ll generally do at the beginning of any web project: structure your data and put into the right HTML elements.
Now that this is done, we can focus on the style and functionality. In other words, now we can add more color, formatting, and positioning to our HTML document. In tutorial three, we'll take a first look into the world of CSS, the language of styles on the internet.
🧐 Practical challenge
Try replacing the About and Portfolio section images with your custom images. Ideally they should be square images and not super huge. If you’re having trouble finding nice images, download some images from this folder.
📗References
❓ FAQ
Q. An element is not showing on the screen?
A. Check if that element is properly closed / there’s no mis-balanced HTML tags in the code. Use the Developer Tools in the browser for faster debugging
Q. Can we use more interesting / colorful images instead of the boring gray ones?
A. We’ll add the final images later when we study CSS. For now, it's easier if we focus on the data first, and get the structure of the page right.
Q. It's hard to remember so many HTML tags and their functionality. Should I learn them off by heart?
A. It happens to all of us in the beginning. The key is to keep practicing, and soon they’ll become second nature to you.
Q. The page looks very dull. Can we add some colors to it?
A. As mentioned previously, we’re only focusing on the content and structure in this tutorial as that’s what HTML is all about. Later in the course we’ll look into styling and colors!
Q. I’ve read about semantic HTML and elements like section, article and nav. Should we use them instead of divs and spans?
A. HTML5 defines a lot of new components that one can use instead of div or span. In the real world, we recommend using semantic HTML components whenever possible. For this course, we’d like to keep the number of new concepts we introduce to a minimum, hence, there’s no mention of semantic HTML. If you’d still like to learn about them, we can recommend this article.